TIPS & AIDS
(Note: Click on the hyperlinks or photos for a larger image below and more detailed information on the subject.)
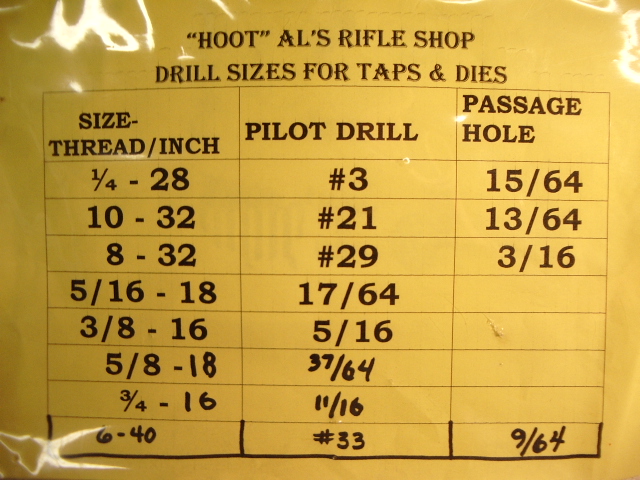
* Drilling
& Tapping Chart:
* Inserting Lock on a stock; Removal of barrel from a stock:
* Making A Replacement Mainspring:
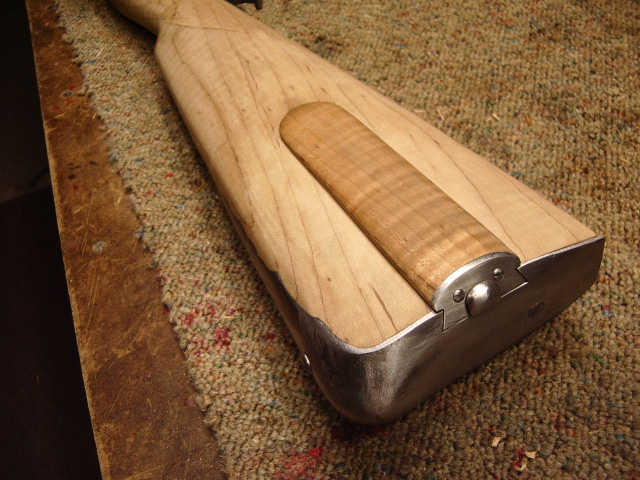
* Making & Installation of Nose Cap:
* Building A Brass Percussion Lock:

* Making
A "Bookie" Barrel Tester: 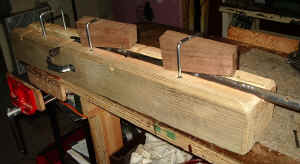 (Click
this link to go to the how-to page)
(Click
this link to go to the how-to page)
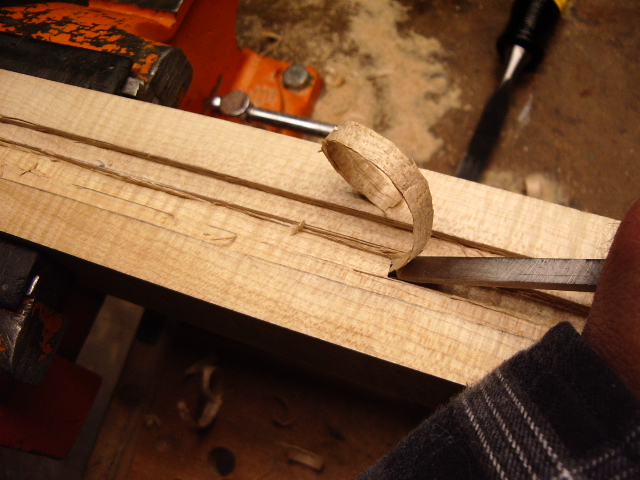
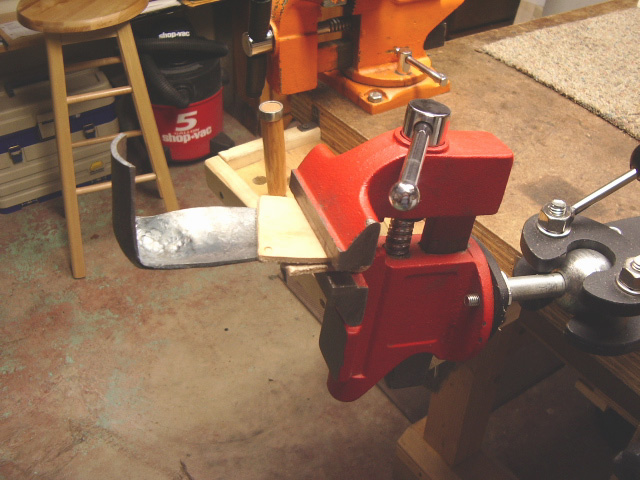
* Aid For Soldering On Barrel Tenons: (Courtesy of "Pack Dog" Ken Guy of Chattanooga, TN)
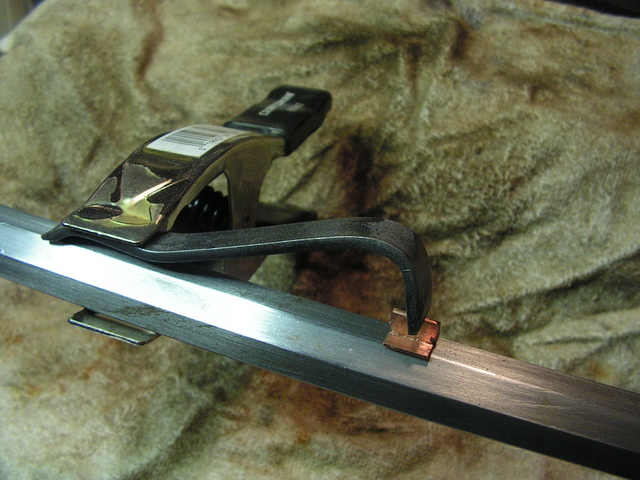 Ken uses a piece of bent steel with a notch in it to hold the tenon and then
clamps
Ken uses a piece of bent steel with a notch in it to hold the tenon and then
clamps 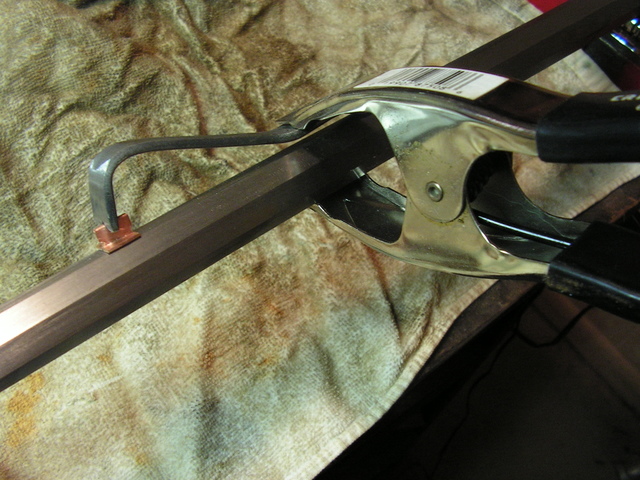 the
steel bar to the barrel. You have to tin both pieces prior to soldering
onto the barrel. This technique can be used for both round and octagon
barrels.
the
steel bar to the barrel. You have to tin both pieces prior to soldering
onto the barrel. This technique can be used for both round and octagon
barrels.
Thanks Pack Dog!! Good idea!
* "Chunk Gun Adapter": Making a "Chunk Gun Adapter" to convert you rifle into a chunk gun.
(Note: I understand there are some Chunk Gun Associations do not allow this adapter to be used on rifles in competition. Therefore, check with range officials prior to entering. Bevel Brothers will allow me to use this on my rifle. Sgt. York Shoot will not.)
* Bedding The Breech Area: Joe came into the shop the other day and said his breech area seems to be a little loose. To remedy this, the best solution was to bed the breech area with Acra-Glass epoxy. This will fill any voids making the breech more solid and stronger.
* Inletting a Tapered Pistol Barrel:
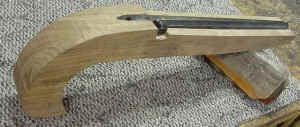
 This
works for those of you who have small drill presses like me. This is a short
jig that allows you to center the drill bit and have sufficient room for
both the drill bit and the gun.
This
works for those of you who have small drill presses like me. This is a short
jig that allows you to center the drill bit and have sufficient room for
both the drill bit and the gun. 
* GOLDEN MEAN INFORMATION: Here's some good information regarding the use of the Golden Mean proportions and how it was used in gun making. Note; the Golden Means was a tool, used by gunmakers, but this did not apply to all schools of gunmakers. It was mainly an aid.
* Installing a Flash Hole Liner (Photo Album)
* Installing Wooden Patch Box Lid:
(Another web page with more information on making the lid and the latch mechanism)
* "Bench Jack" for the workbench: Great bench aid for your workbench.
 Click Here --->Components
of "Bench Jack"
Click Here --->Components
of "Bench Jack"
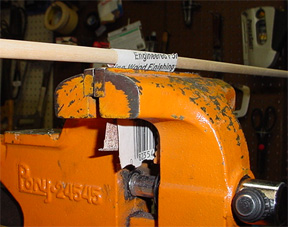
* Ram Rod Shaver: (Scrap steel with various hole beveled out)
Stick shaver in to vise and run ramrod back and forth to shave it down to size to fit into ramrod hole on stock. (Click photo to enlarge.)

 Then
fold a piece of sandpaper over the ramrod and stick the loose end of the
sandpaper into the vise. (not too tight) Now pull and push the ramrod
through the sandpaper to smooth out the surface of the rod. You use the
same method if you like to taper the end of the rod that fits into your forearm.
(Click photo to enlarge.)
Then
fold a piece of sandpaper over the ramrod and stick the loose end of the
sandpaper into the vise. (not too tight) Now pull and push the ramrod
through the sandpaper to smooth out the surface of the rod. You use the
same method if you like to taper the end of the rod that fits into your forearm.
(Click photo to enlarge.)
* Drying Your Stock: Trouble drying your oiled stock inside the home during the Winter?

Using wire hooks, hang the stock from hooks screwed into your ceiling joists. This will suspend the stock toward the ceiling where the air is dryer and warmer. (Click photo to enlarge.)

* Sound Deadener Trick:
Ever try to cut some metal in the shop and have it make all kinds of noise or try to file a piece of metal, doing the same thing? My wife is after me if I make too much noise. And metal noise really bothers her. I figured out a slick solution. I have some of those small spring clamps with rubber tips. I clamp it onto the metal and it serves as a deadener to the noise.
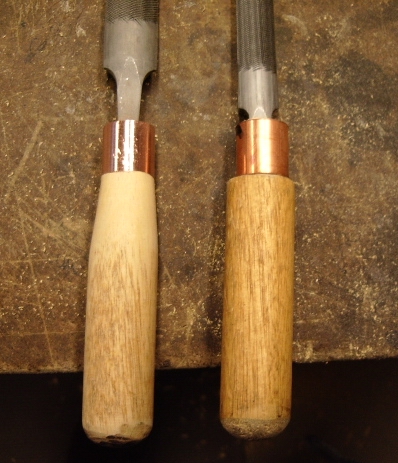
* Scrapers (handmade from spring stock): 3/8" ramrod groove and 5/16" flat bottom


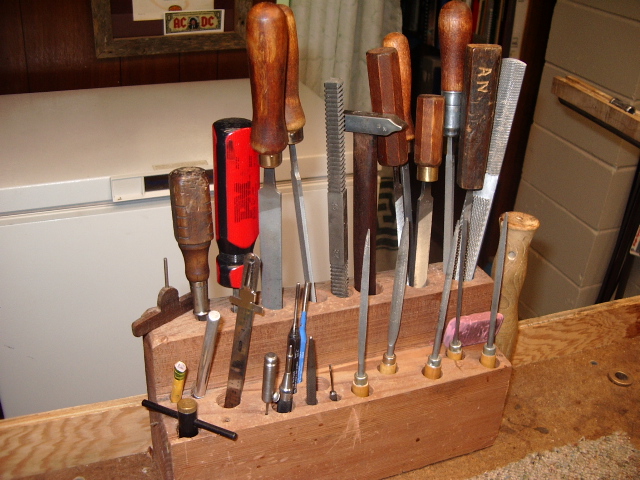
* Bench Tool Holder: Made out of a chunk of scrap wood; drilled a bunch of 1/2" diameter holes to hold my files, screwdrivers, mini-hammer, pencil, knife, punches and etc. (There are 29 tools in the holder, can you find them all?)
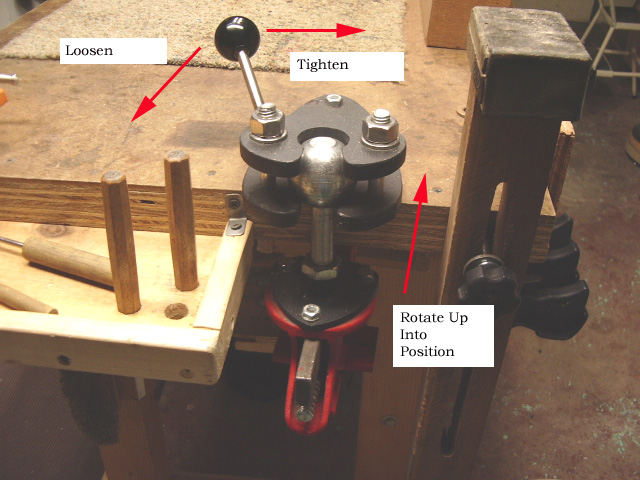
* Rotational Vise: Bought this from Jim Chambers at Conner Prairie a couple years ago. Great device. I attached a 3" vise to it and it can rotate and store below the bench top when not in use, or it can be brought up and rotated 360 degrees. Great for filing, carving and engraving.
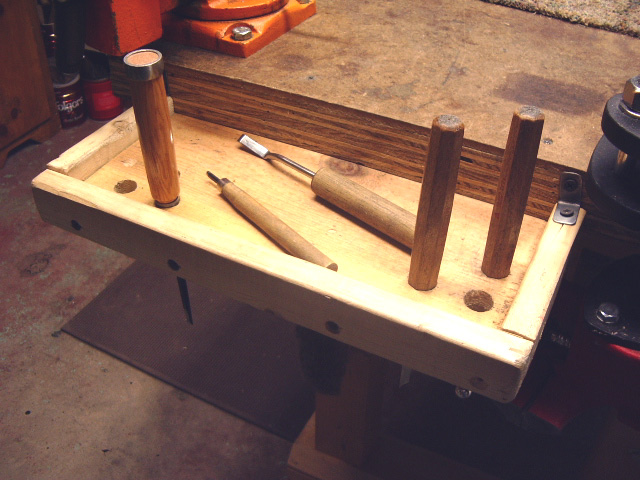
* Tool Tray: Put this tray on the end of the bench between the large vise and the Bench Jack. Great for holding chisels when working and laying small carving tools. Saves having to reach under the gun or over the top of it to get to the tools.
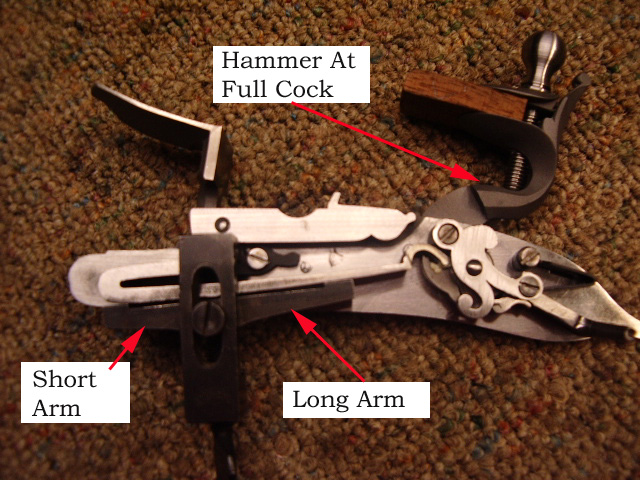
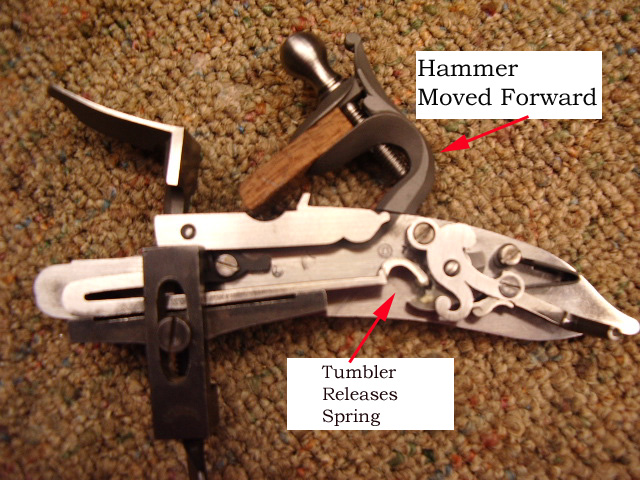
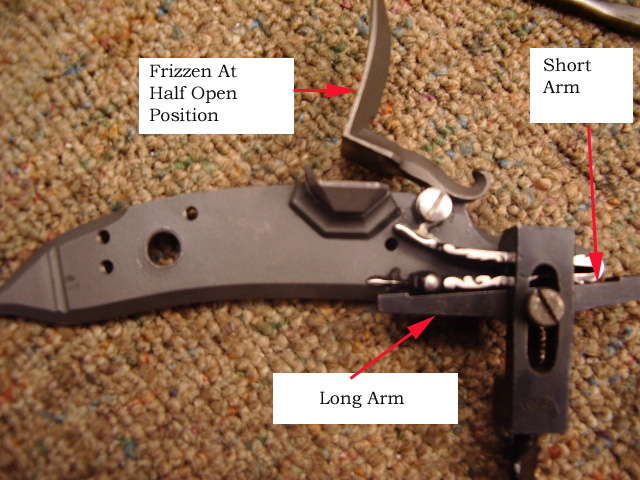
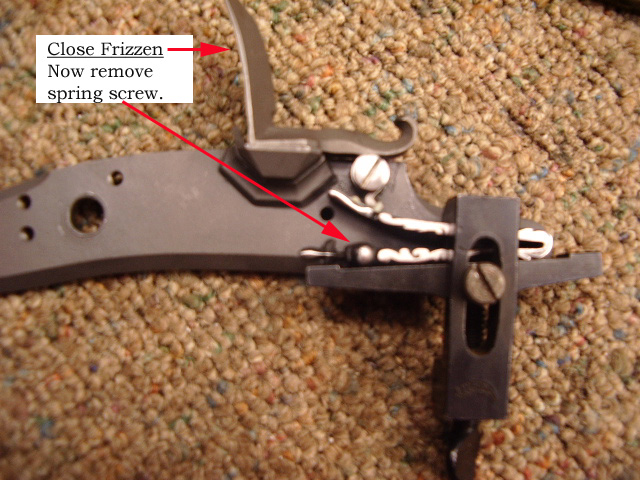
* Spring Vise: I use spring vises to remove both main springs and frizzen springs. The spring vise comes with a short side and a long side to the arm of the vise. Depending on the type of spring or orientation, I may flip the arm on the vise for the task. Here are a few photos showing how I remove the springs.
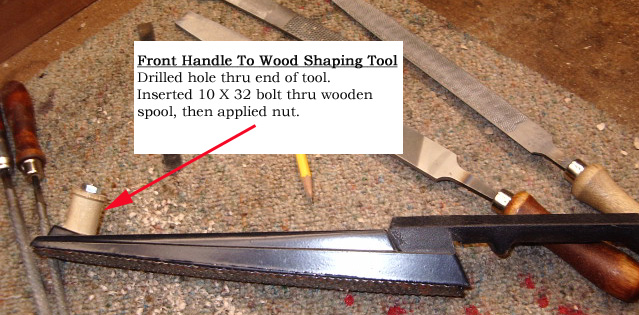
* Wood Shaping Tool: Modified the tool by adding
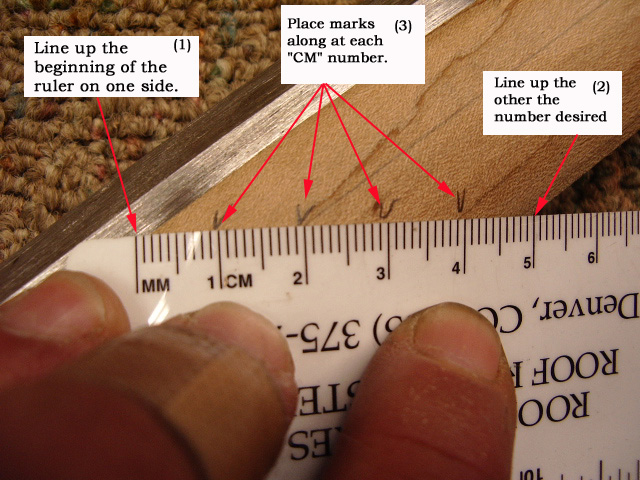
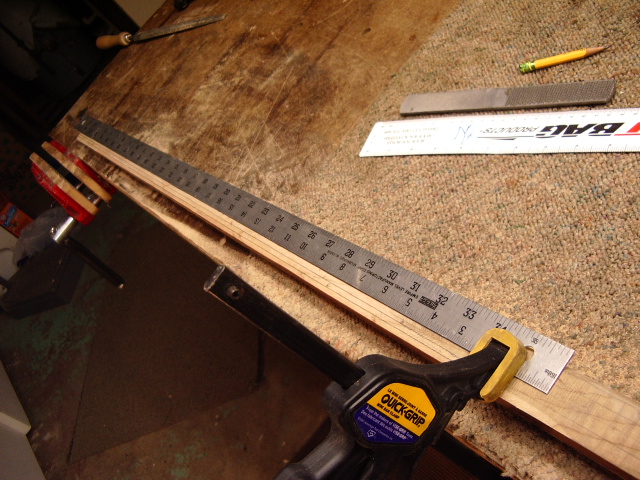
I use a clamp sometimes to help me hold the ruler on one end so I can draw my liners easier.
Hoot AL Rifle Shop
If you like the site or have any questions, drop me a line by clicking on "Hoot" below.

(c)
Copyright 2005. All Rights Reserved.