Making A "Bookie" Barrel Tester: (Per Muzzle Blasts Article: January 1996)
Needed one for my own shop and decided to make my own instead of keep borrowing Bookie's tester.
First I acquired a big chuck of wood and cut it down to 4" X 6" X 4' long.
Then I cut a "V" channel down the center by drawing two lines down the center. Set my hand radial saw at 45 degrees with a depth of 1-3/4" and cut down each line toward center. This cut out a real nice "V" channel.
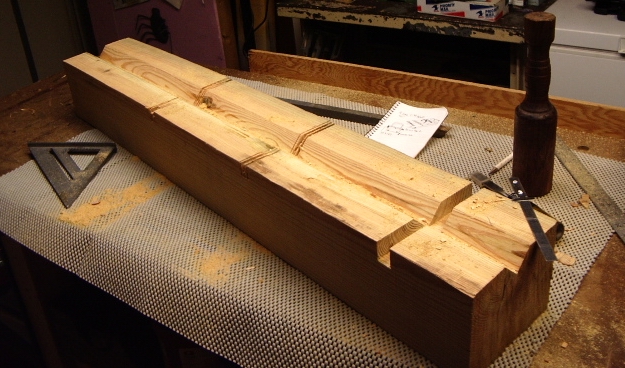
 Next I made marks perpendicular at 4",
14" and 24". At these marks I drew 1/2" wide marks. Between the
lines I made several cuts 13/16" deep, then used my wood chisel to remove
the wood. This will be the groove for my 1/2" bar stock to rest. The
bar stock is what the breech end of the barrel rests against when the barrel is
laid down into the "V" channel.
Next I made marks perpendicular at 4",
14" and 24". At these marks I drew 1/2" wide marks. Between the
lines I made several cuts 13/16" deep, then used my wood chisel to remove
the wood. This will be the groove for my 1/2" bar stock to rest. The
bar stock is what the breech end of the barrel rests against when the barrel is
laid down into the "V" channel.

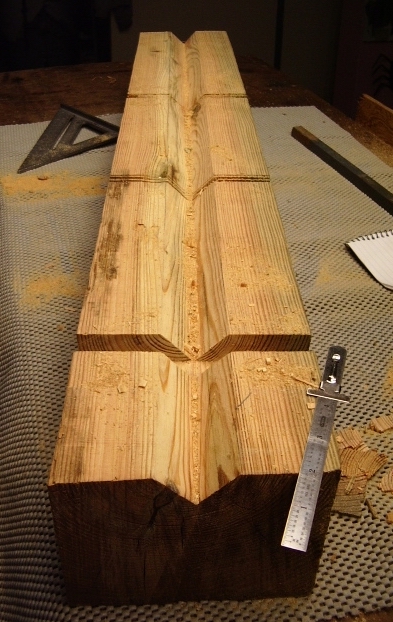
To take the sharp edges off along the top of
the tester ,
I used my draw knife to cut a 3/8"X 3/8" chamfer along the edges.
,
I used my draw knife to cut a 3/8"X 3/8" chamfer along the edges.
In the center between each long segment, I
drilled two holes for the metal loops. Since Bookie's forge is not open, I went
to the local general hardware store and bought some 3" X 7" X
3/8" bent metal threaded loops. I drove the nut to the top of the threads.
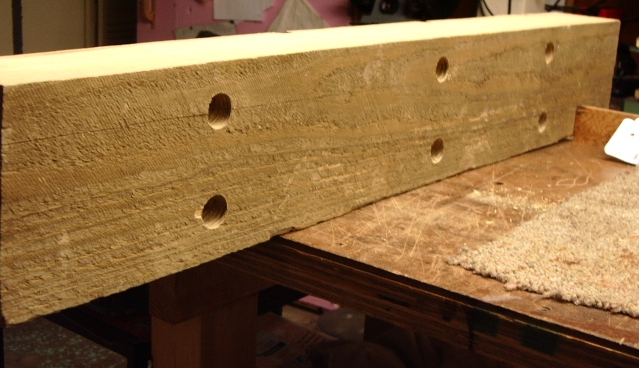
After the 3/8" holes were drilled thru the stock, I then used a 1/2"
forstner drill bit and drilled down deep enough flush the nut and washer with
top of the stock. On the lower end, I used a 1" forstner bit to drill
a hole deep enough to be able to put a washer, lock washer and 3/8" nut
onto the exposed threaded portion of the loop. 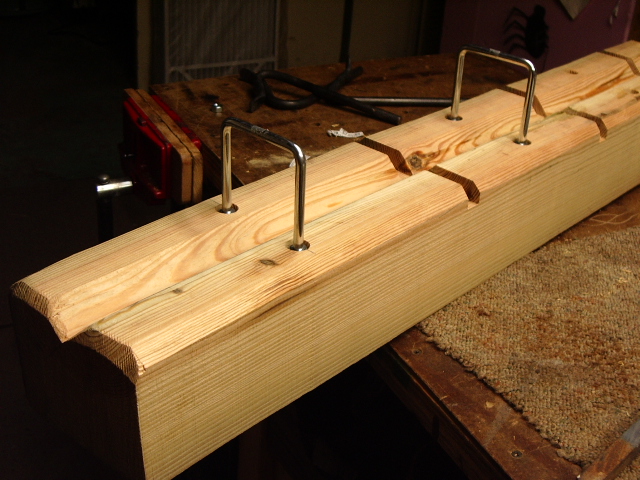 This
also recessed the end of the bolt from being exposed. The 1" diameter
allowed enough room for a socket to be used to tighten the nut.
This
also recessed the end of the bolt from being exposed. The 1" diameter
allowed enough room for a socket to be used to tighten the nut.
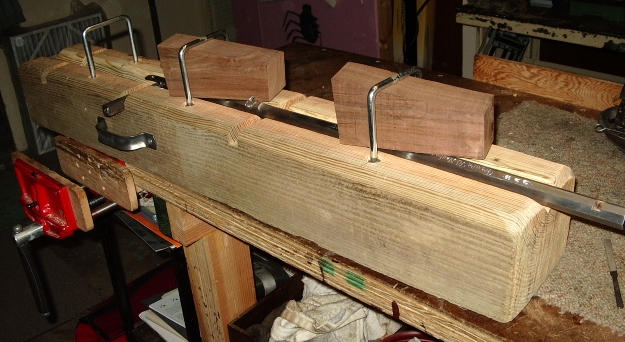
I cut out a couple walnut wedges to secure the barrel in the loops and put a metal handle on either side so I can carry the tester to the truck and from the truck to the testing area.
Here is the finished product.

<--Barrel Testing Movie: (click on photo)
(Note, my wife was holding the camera and when the barrel went off, she kinda jumped.)
Hoot AL Rifle Shop
If you like the site or have any questions, drop me a line by clicking on "Hoot" below.

(c)
Copyright 2005. All Rights Reserved.