Making Ram Rod Pipes:
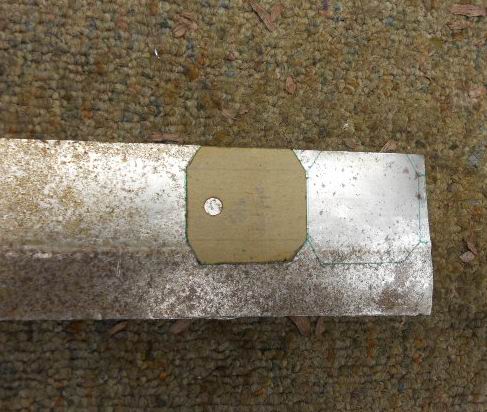
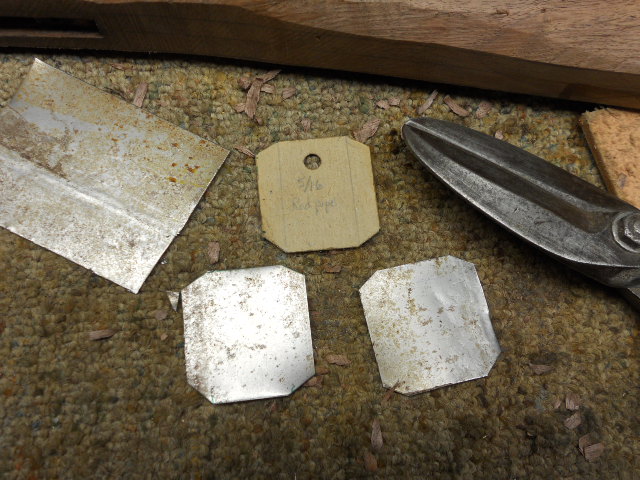
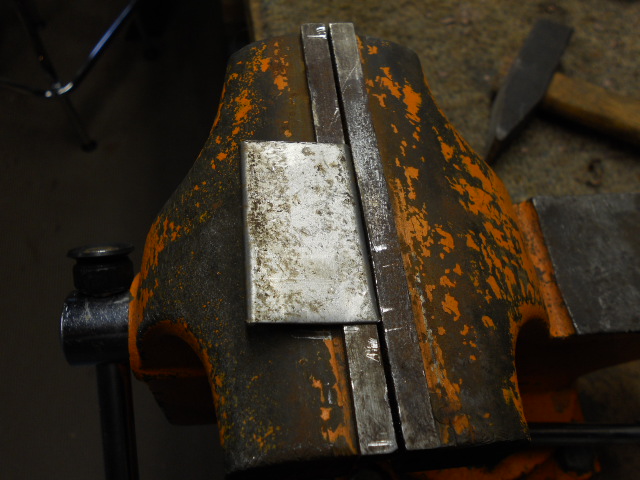
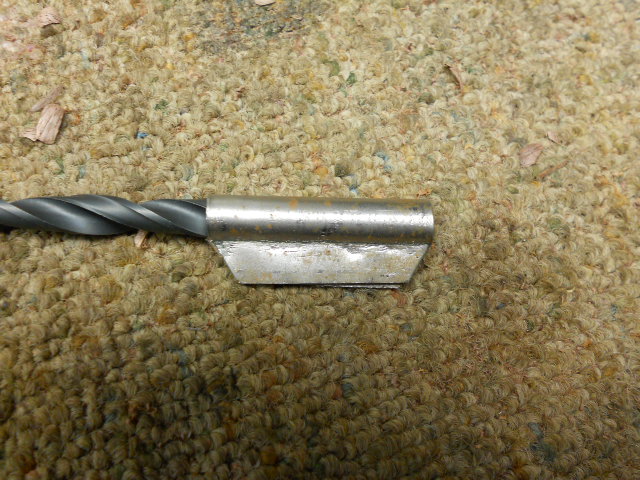
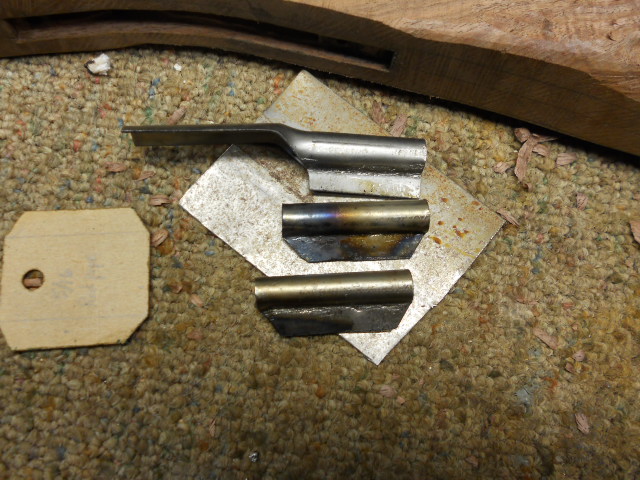
To make the pipes, I found some scrap sheet metal in my shop. The thickness of the metal was .027" or .70 mm. I used my thimble pattern to trace on to the metal. The metal was cut out. In the third photo below is a finished pipe and an unfinished pipe. I will walk you thru on how to make the pipe and hope this helps someone out there.

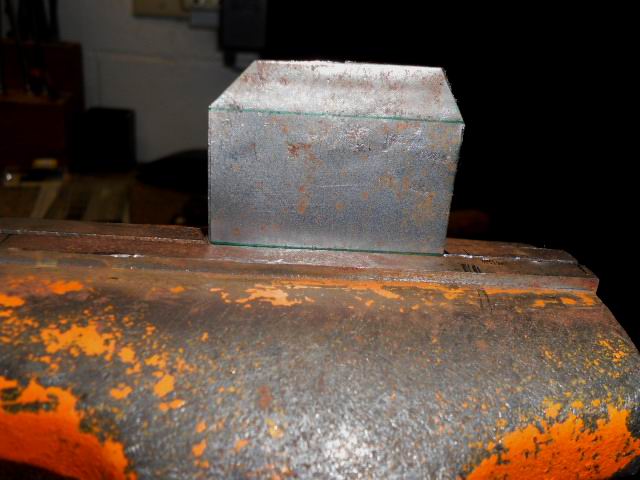
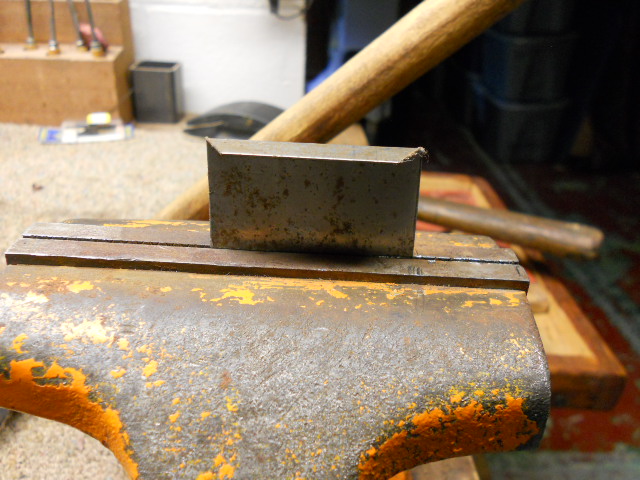
I drew green lines on the tabs which will be bent. This would be along the longest sides of the pattern. The piece was put into a vise along the green line and bent over 90 degrees. Then the other side was put into the vise and bent 90 degrees again.
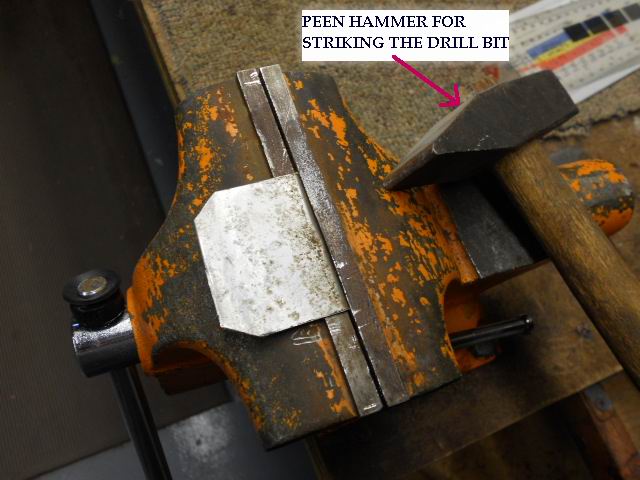
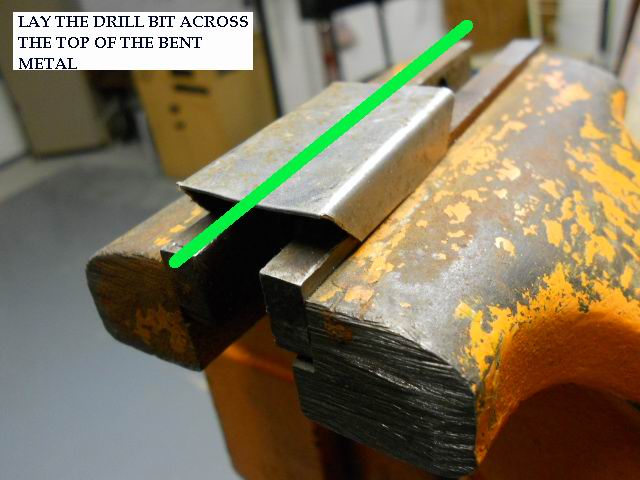
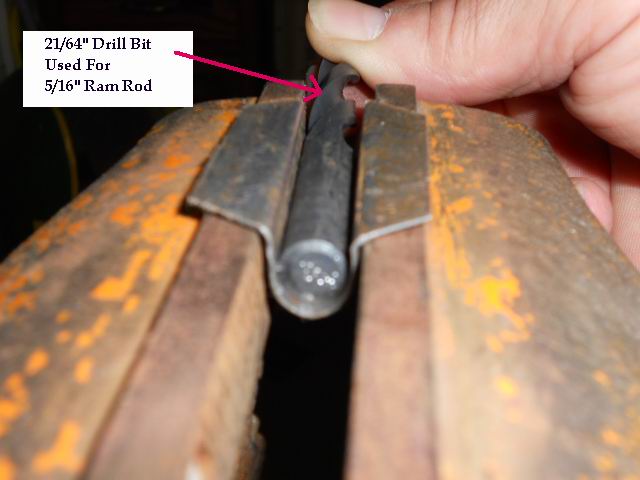
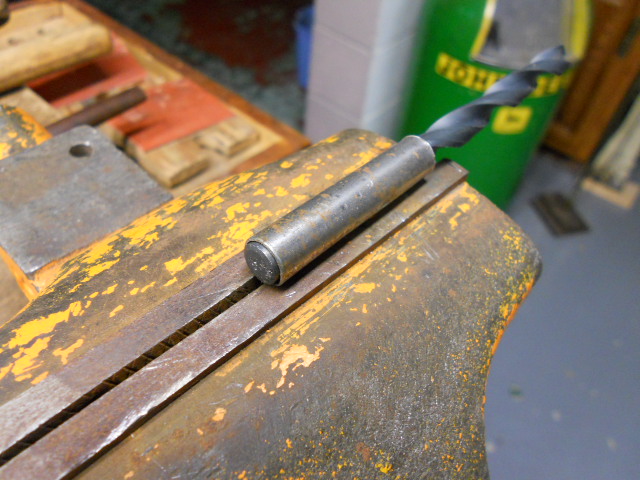
Now this will resemble a small table. I partially open the vise and set the material across the vise. The green line represents a drill bit I lay down across the bent sheet metal. Since this is a 5/16" ramrod pipe, I used a 21/64" drill bit. This slightly larger than the 5/16" and will allow me some room to play with when shaping the pipe. Using a peen hammer as shown above, I hammer the drill bit down onto the sheet metal. At this point the drill bit will bend the sheet metal till the tabs are flat against the top of the vise.
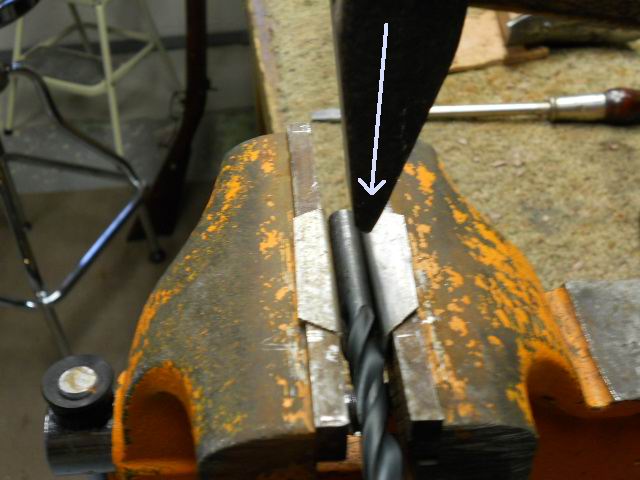
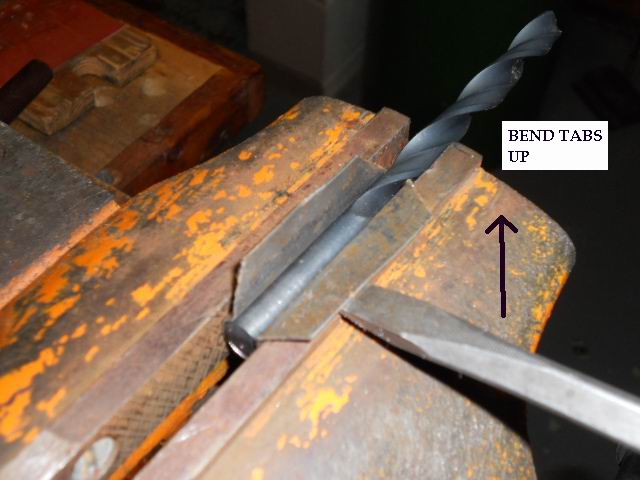
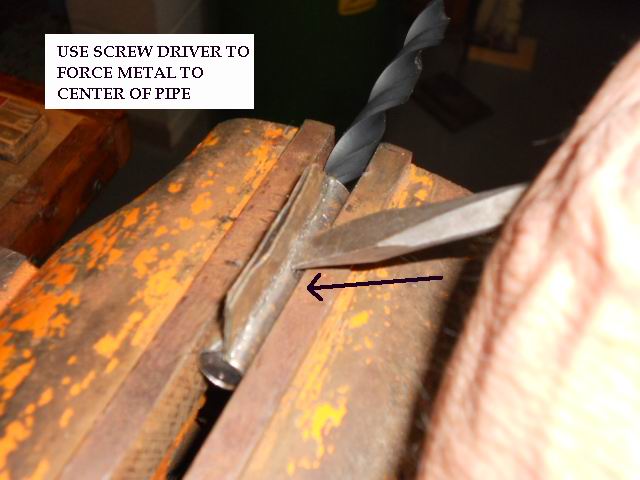
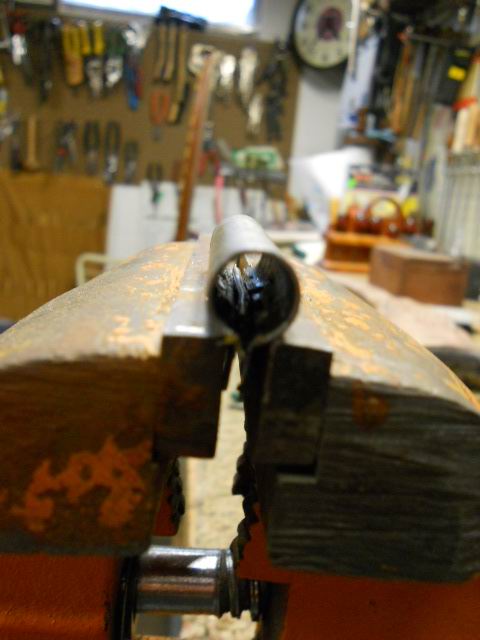
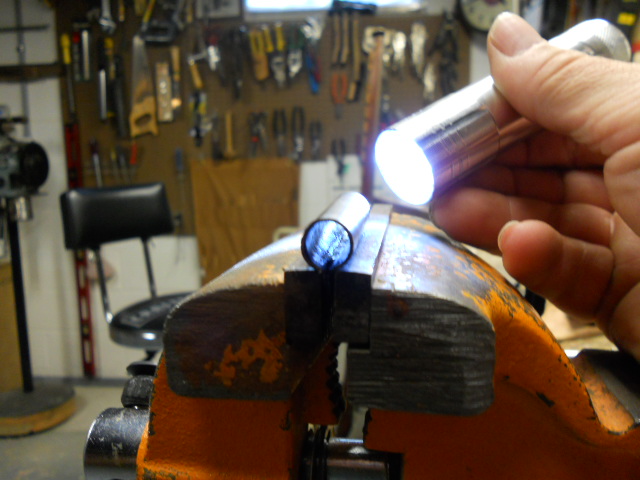
Now you tighten the vise against the drill bit and sheet metal. This will hold them together. Using a flat bladed screwdriver, I insert the blade of the screwdriver under the tab and bend the tab up till it is vertical. I do this on both sides of the pipe. Next I use a hammer and the screw driver to work the tab over the top of the drill bit toward the center of the pipe. This is done on both sides.
Then I loosen the vise and remove the drill bit with the pipe on it. I reinsert the pipe into the vise with tabs down and tighten the vise to squeeze the tabs together. I remove the drill bit from the pipe. Slightly open the tabs and apply flux inside the tabs and the pipe. A small piece of solder is then inserted into the pipe. The pipe is rested on top of the slightly opened vise and heat is applied till the solder melts and sinks into the tab area. At this point the vise is quickly tightened and the tabs are squeezed together. When cooled after a few minutes the pipe is almost finished.
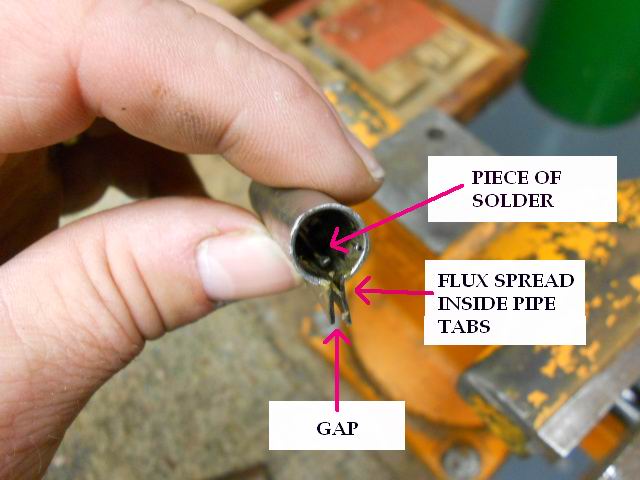
Here are some photos showing the solder inside the pipe. I use a round file to remove any excess solder inside the pipe. Below are the finished pipes.
Believe I will add this page to my Tips & Aids page.
Hoot AL Rifle Shop
If you like the site or have any questions, drop me a line by clicking on "Hoot" below.

(c) Copyright 2005. All Rights Reserved.