Jaeger Transitional Rifle- Christian Springs/Marshall Style
Process of building the rifle:
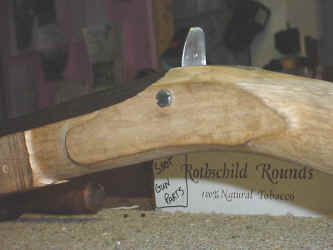
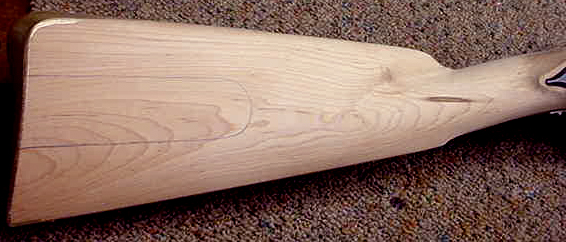
 In
the beginning it was a hand full of parts. At
this stage I've already inlet the barrel and tang into the stock.
In
the beginning it was a hand full of parts. At
this stage I've already inlet the barrel and tang into the stock.

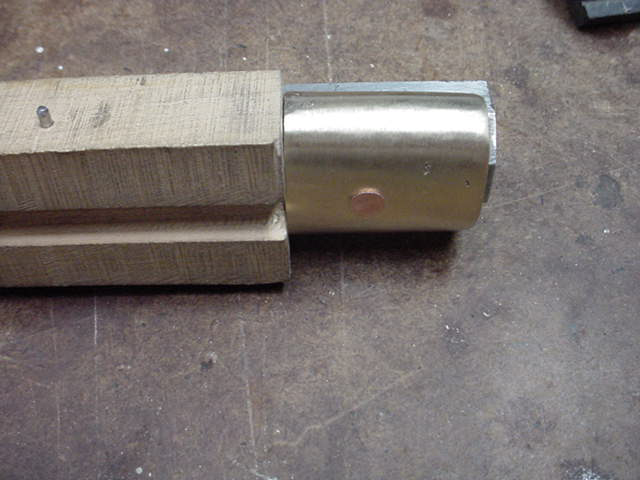
The barrel tenons were made of brass; the tenons and stock have been drilled for 3/32" pins.

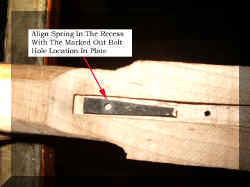
The lock plate was inlet and then the lock plate/side plate bolt was drilled and installed.
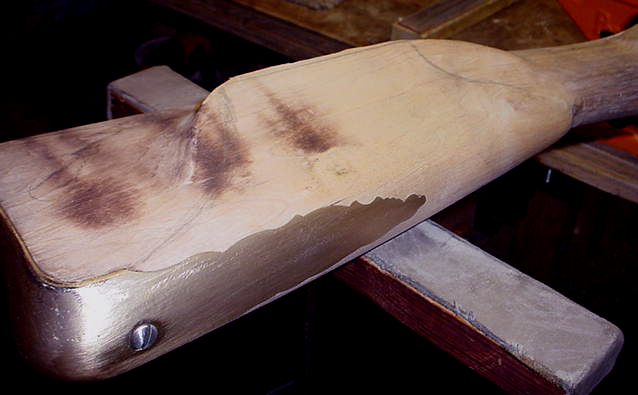
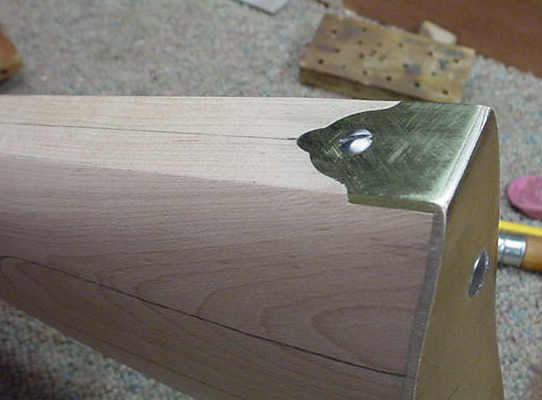
 Butt plate was inlet into the stock.
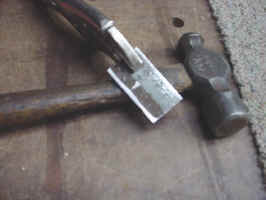
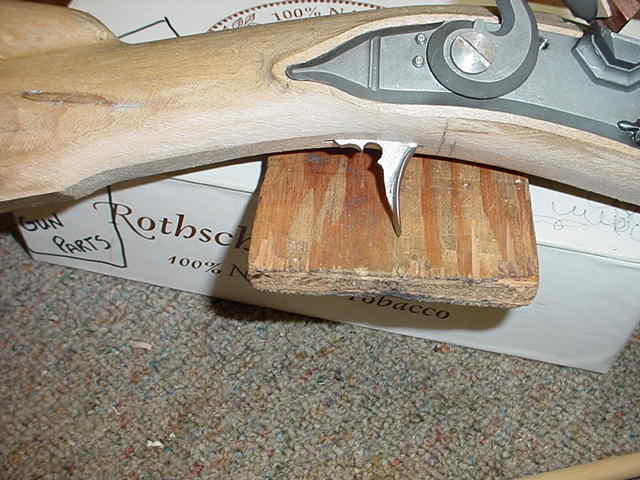
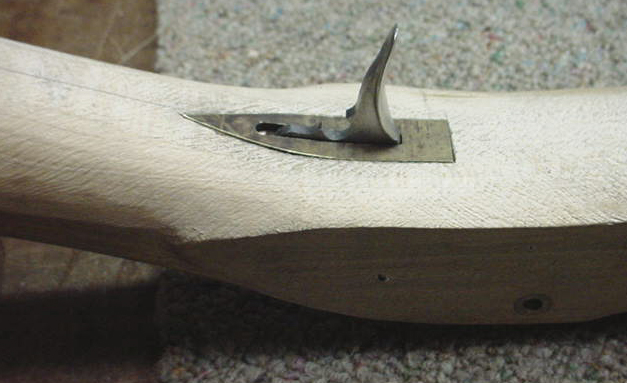
Piece of steel cut down to hammer into a trigger.
 Finished trigger after cutting to shape and filing into shape.

Trigger slot cut into the bottom of the stock for the trigger.
 Next the trigger was positioned and pinned into the
stock
Next the trigger was positioned and pinned into the
stock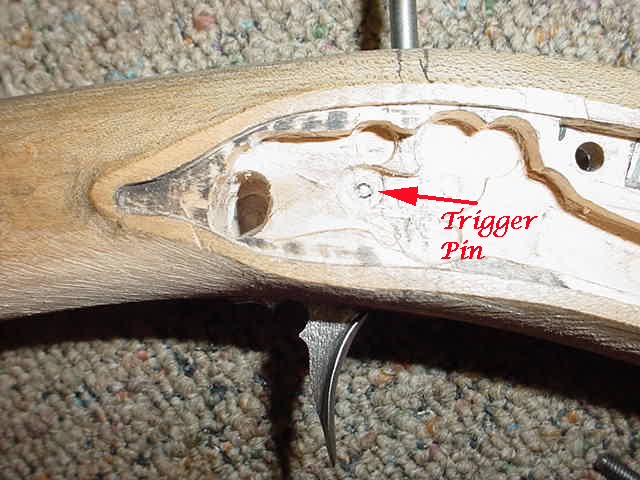 k.
k.
 Installed all three thimbles into the stock and pinned them with 1/16"
pins. The next step will be to
install the nose cap.
Installed all three thimbles into the stock and pinned them with 1/16"
pins. The next step will be to
install the nose cap.
Nose
cap end of muzzle was laid out and the nose cap was fitted. 
Next the nose cap was riveted to the stock with a copper rivet.
The
rivet was filed down and smoothed out. 
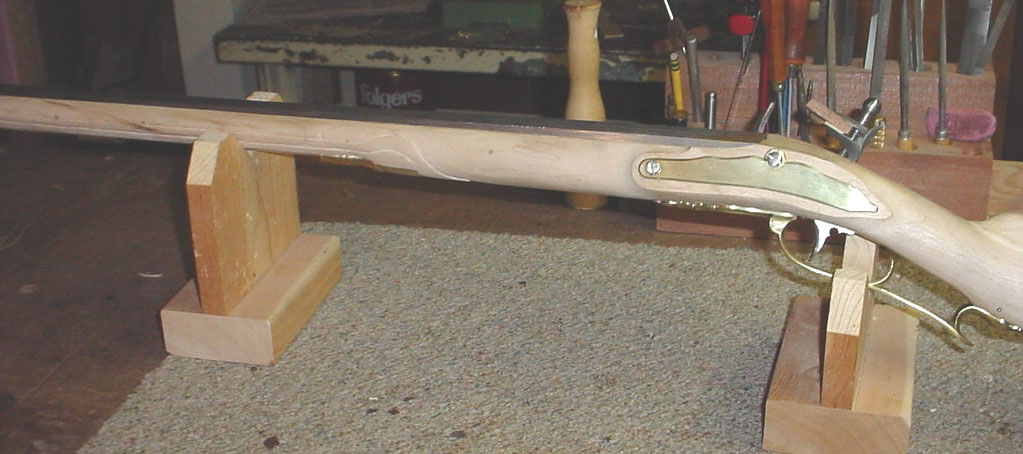
Made a trigger plate out of brass and inlet it into the stock.

Then I buttoned the barrel tang to the stock with a 10-32 tang bolt down into the front of the trigger plate. The brass trigger plate was reinforced in this area by silver soldering a piece of steel.
Next I wanted to change the cheek of the stock from the Jaeger to a more transitional styled cheek piece. This is what it looked like before. Note the pencil markings.
 Then
I carved out the stock to the lines.
Then
I carved out the stock to the lines.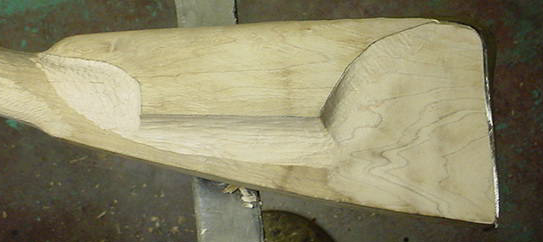
.
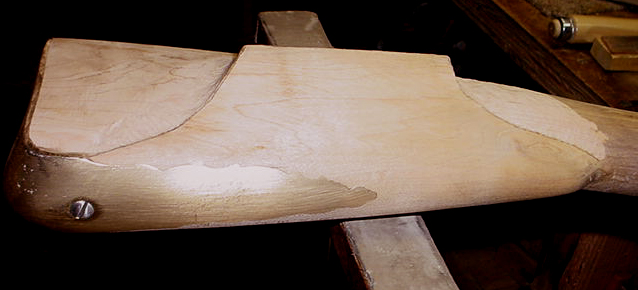
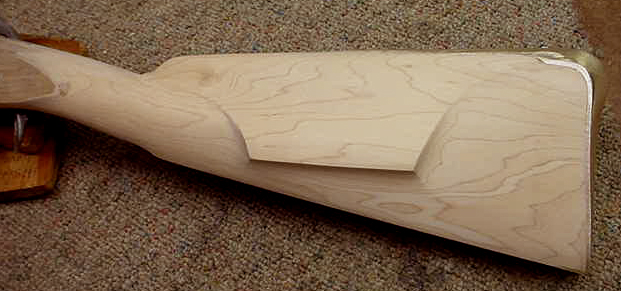
Next I took the "fish-belly" out of the butt stock and cleaned up the stock.
 I
put in the toe plate and blended it into the butt plate.
I
put in the toe plate and blended it into the butt plate.
 The patch box side of the stock was cleaned up. Note; on both of the photos of
the butt stock, I shaped the comb of the stock and defined it at the wrist
junction. Also, I made a paper pattern of the patch box lid and laid it
out on the side of the stock. This area will then be flattened with a file and
sanded smooth with 400 grit paper in preparation for the patchbox dovetails and
the matching lid. This is when the fun begins.
The patch box side of the stock was cleaned up. Note; on both of the photos of
the butt stock, I shaped the comb of the stock and defined it at the wrist
junction. Also, I made a paper pattern of the patch box lid and laid it
out on the side of the stock. This area will then be flattened with a file and
sanded smooth with 400 grit paper in preparation for the patchbox dovetails and
the matching lid. This is when the fun begins.
Next step was to install the patchbox cavity and the wooden lid.
Click --> Installing Wooden Patchbox Lid
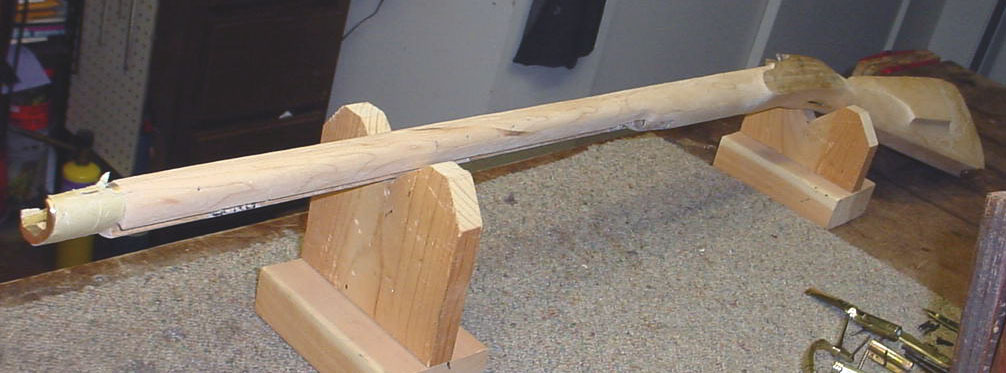
 I've
started rounding the forearm and along the ramrod channel already. Again,
using the simple 3/5/7 rule of thumb, the task is simple and alot of fun. The
stock feels like it's already lost 1/3 of it's weight already.
I've
started rounding the forearm and along the ramrod channel already. Again,
using the simple 3/5/7 rule of thumb, the task is simple and alot of fun. The
stock feels like it's already lost 1/3 of it's weight already.
Soon I will be cutting in an incise line down the sides of the upper forearm.
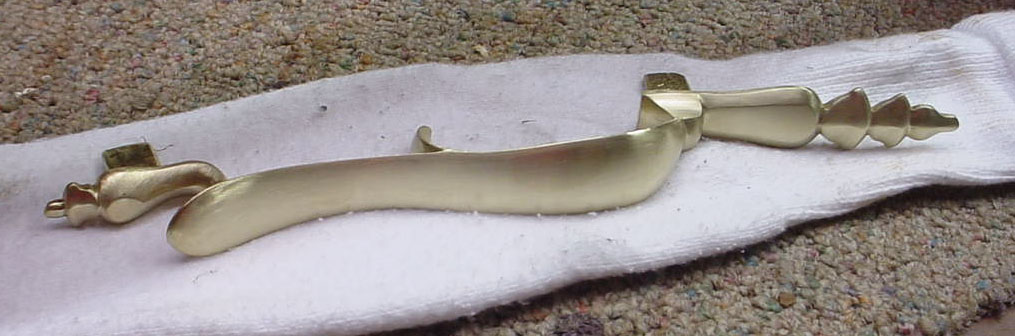 For
something different to do, I started cleaning up the sand-casted trigger
guard.
For
something different to do, I started cleaning up the sand-casted trigger
guard.
I concentrated on the belly of the stock to round it properly in preparation for inletting the guard into the stock.
Once I was satisfied with the belly of the forearm, I wanted to add some incise line down along either side of the forearm. To determine how far down the side I used my Golden Mean dividers. I used the end with the 5 measurement and spanned it across the width of the forearm. Then I rotated the dividers and set the dividers in alignment with the top edge of the forearm. I made a mark on the forearm, then proceeded down the length of the forearm. Drew a line across the marks and now I had a line that was 3/5 down the side of the forearm. Using my knife, I cut down along the line and then used my 5/16" chisel knife to cut toward the line. Well shoot, I guess you probably don't care to hear about all the steps needed to do all this, so I'll jump right ahead.
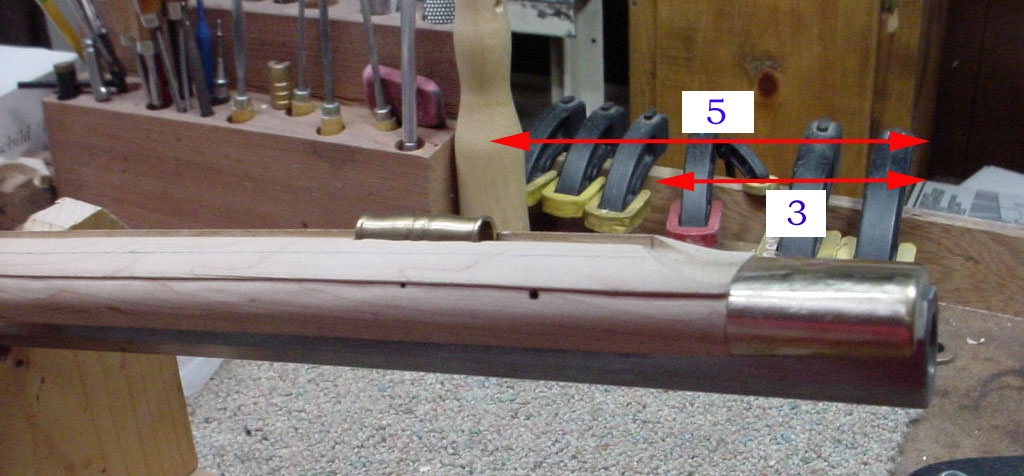
Next I wanted to determine where end of the lower forearm should end in reference to the nose cap. Early guns had a short distance between the end of the forearm and the nose cap. So in this case, using the 3 to 5 ratio, I came out with the right length.
 I
looked at the rear thimble area and wanted to highlight this area with a little
carving. The end of the carving will match the end of the trigger guard
when it is installed.
I
looked at the rear thimble area and wanted to highlight this area with a little
carving. The end of the carving will match the end of the trigger guard
when it is installed. 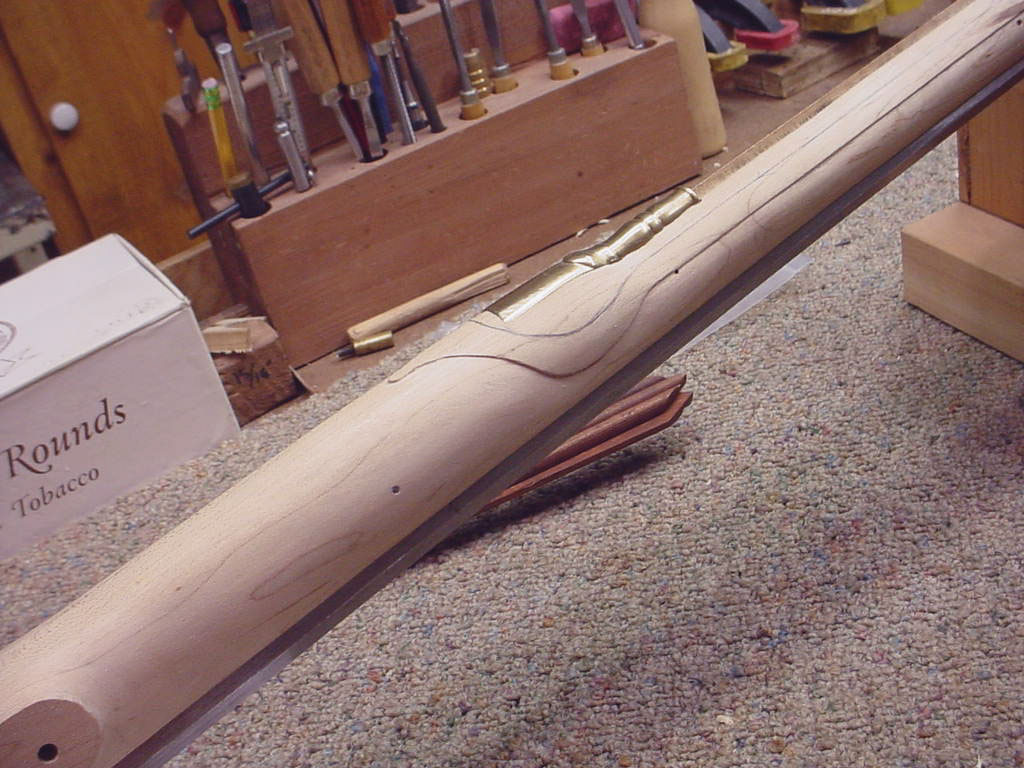
If you noticed, I've got another line I want to add again inside of the one already carved. I want to do this to narrow the stock alittle bit making it easier to install the front swivel later.
 I
also took a break and copied the lock panel using some stiff yeller paper and
then cut it out to shape. Laying this on the side plate panel, I could trace a
line around the template, then I could match the lock panel on the other side.
Also in the photo is a my rough draft drawing of the side plate I going to cut
out of brass later. The side plate side was shaped to match up with the
lock panel.
I
also took a break and copied the lock panel using some stiff yeller paper and
then cut it out to shape. Laying this on the side plate panel, I could trace a
line around the template, then I could match the lock panel on the other side.
Also in the photo is a my rough draft drawing of the side plate I going to cut
out of brass later. The side plate side was shaped to match up with the
lock panel.
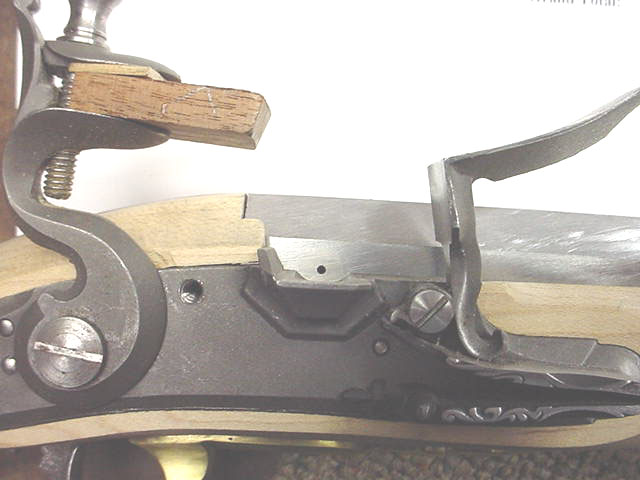
The brass plate was cut out of 2/32" stock and filed down to shape. I mounted it to the side of the rifle. Then I partially inlet the trigger guard. Next is to shape the guard so it sits flush and then partially inlet it into the stock. Here is a photo of the side plate and trigger guard mounted on the stock after final inletting.
![]()
I'll show you the nose cap area showing the incised lines along the ramrod channel.
Here
is a view of the finished forearm and the trigger guard. 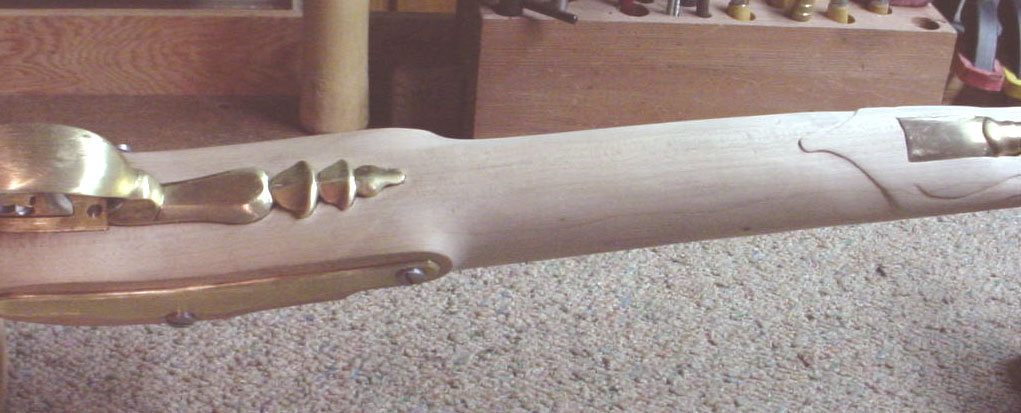
Here is a close up of the trigger guard installed along with the side plate.
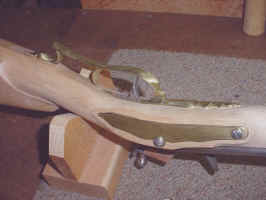
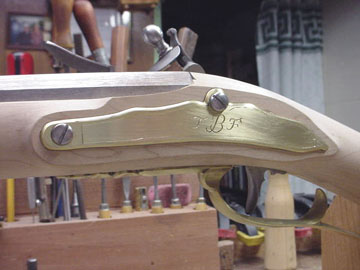
I took down the faces of the side plate and the face around the lock to allow the lock plate to stand out. Then I installed the front site. When I got to the rear site, I noticed I bought one that was too big. So I had to reorder one from The Track. In the meantime, I engraved the side plate with the initials of the new owner and and played with a little engraving on the buttplate. Please note, I do not consider my self an engraver.

I decided to install the flash liner into the barrel. If you want to see the steps taken, you can click on this link. Flash Hole Liner Installation I put this under the Tips & Aids page. With the flash hole liner installed, the next step will be to Install the sights and engrave the barrel.

 I added an incised line along
the butt of the stock.
I added an incised line along
the butt of the stock.
 Next
I installed the rear and front sight.
Next
I installed the rear and front sight.
Then
I will engraved the barrel with my name and my friend's name. 
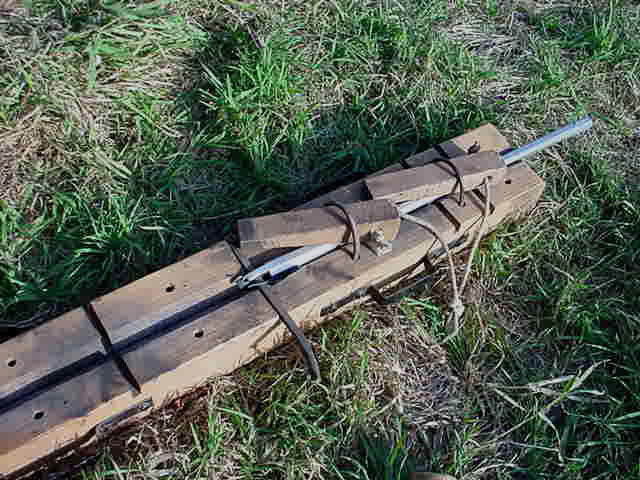
Now I was able to proof test the barrel. To do this, I use 200 grains of 2 ffg powder and two patched balls. This is incase the owner loads it twice with powder and forgets they put a patched ball in the barrel already. Sure did make alot of smoke. I then pulled the barrel out of the tester and wiped it down with a thin cloth to feel for any deformities. The barrel tested out to be fine.
With the barrel tested, now I'm starting the browning process. While this cooks, I sanded and cleaned up of the stock.
I
stained the stock and started oiling the stock. Here's a couple photos of the
stock with one coat of on it.

Turning out real nice. There are few mineral streaks and the maple stock has some dense areas with some nice cross grain.
Currently I have 4 coats of oil on the stock and it's taking on a nice sheen to it. The ramrod was stained and oiled, too.
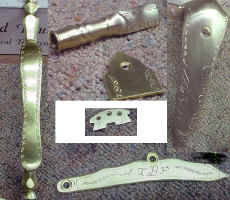
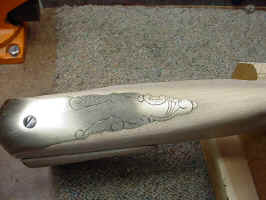
While waiting on the coats of oil to dry, I took some time and embellished the triggerguard, butt plate, toe plate and side plate with a little more engraving. Nothing fancy, but kept simple on purpose. What do you think, does it add something more to the rifle? (Click on "Hoot" down below and drop me a line.)
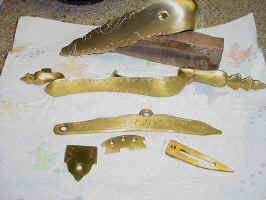
Here is the brass furniture that was tarnished per my friend's request. I failed to put the thimbles in the photo. (Sorry) All the pieces are a nice bronze color.

Assembled the finished and 'browned" lock.

I assembled the wooden patchbox lid assembly before I put the last coat of oil on to it.
Here's
a couple more snap shots of the oiled stock.  It
is getting shinier. I rub it down with 000 steel wool after every 3 coats of
oil.
It
is getting shinier. I rub it down with 000 steel wool after every 3 coats of
oil.

Here is the stock with the wooden patchbox lid installed and the browned lock set into the stock.


Hoot AL Rifle Shop
If you like the site or have any questions, drop me a line by clicking on "Hoot" below.

(c)
Copyright 2005. All Rights Reserved.