Widening The Ramrod Channel:
Next step was to correct the misalignment of the ramrod.
Decided to widen the ramrod channel to 7/16". This is a .62 caliber and a 7 /16"
ramrod would fit it better. To do this I measured over from the narrowest side
of the forearm and across the ramrod channel and made my marks. Then used a
steel ruler to draw my line along the length of the ramrod channel. Then using a
sharp knife, I cut along this line and then back cut or V cut the line. Using a
sharp chisel, I cut straight down along the side I was removing by hand. At the
bottom of the channel, I turned over the chisel and scooped out the remaining
wood, so as not to dig any deeper into the channel.
/16"
ramrod would fit it better. To do this I measured over from the narrowest side
of the forearm and across the ramrod channel and made my marks. Then used a
steel ruler to draw my line along the length of the ramrod channel. Then using a
sharp knife, I cut along this line and then back cut or V cut the line. Using a
sharp chisel, I cut straight down along the side I was removing by hand. At the
bottom of the channel, I turned over the chisel and scooped out the remaining
wood, so as not to dig any deeper into the channel.
Then using a bent 3/8" round file, I smoothed up the transition along the length of the ramrod where the new wall of the ramrod channel was widened.
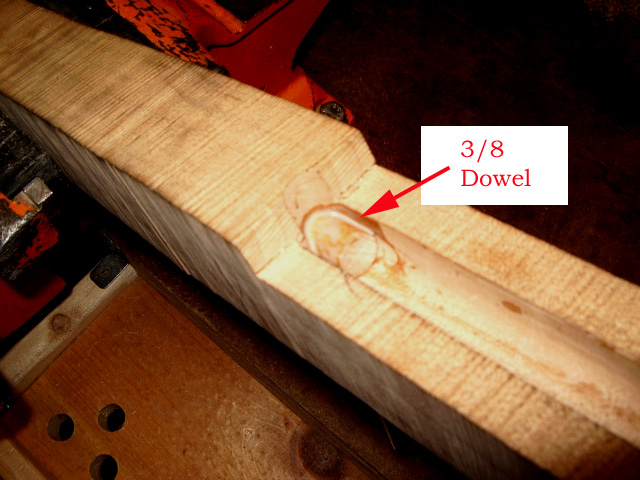
I then measured the depth of the ramrod hole in the forearm using a 1/16" width dowel. Transferred this length to a 3/8 dowel rod. Added a 1/2" to length and cut the dowel at this mark. I slightly tapered the rod on one end. Using a pair of pliers I crimped around the perimeter of the dowel for the entire length. Tilting the rifle, I applied wood glue into the hole and used the 1/16" dowel to spread the glue up and down and around inside the ramrod hole. Then I inserted the 3/8" dowel into the forearm.
 I
will let the glue dry for a few days to ensure it has taken a good set. Then I
will square up the ramrod entry hole and remove the extra dowel to give me a
solid wood surface to drill into.
I
will let the glue dry for a few days to ensure it has taken a good set. Then I
will square up the ramrod entry hole and remove the extra dowel to give me a
solid wood surface to drill into. 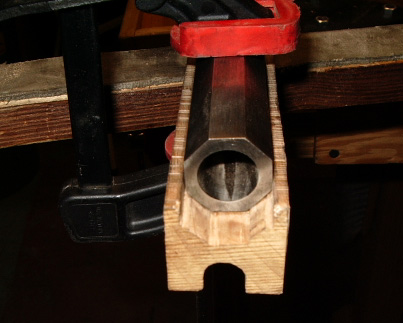
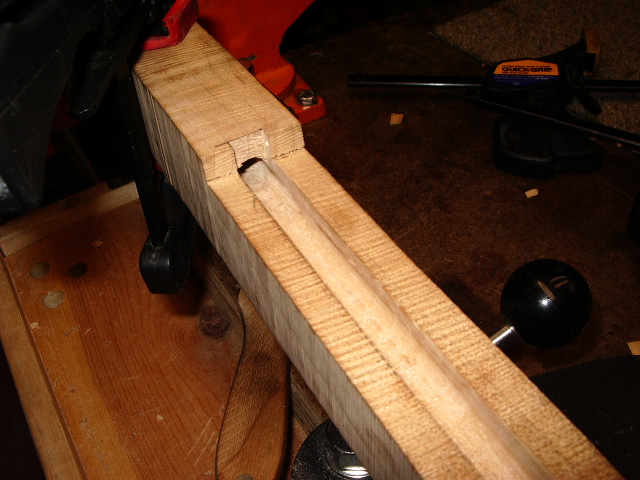
I turned over the gun and reexamined the alignment of the ramrod hole with the bottom flat of the barrel and it appeared to align up much better.
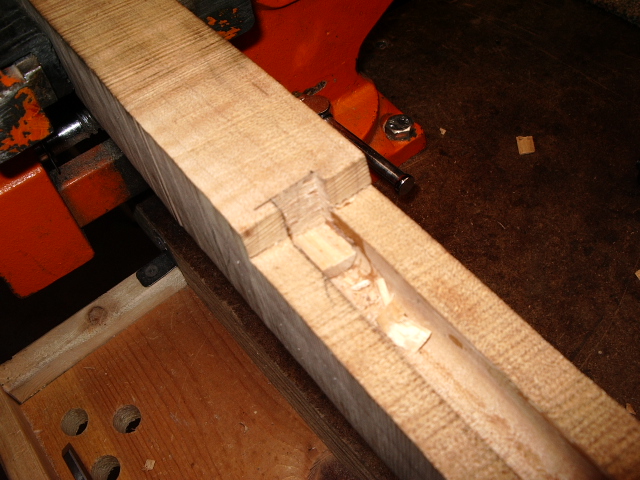
Before we could drill the hole, I had to make a square face on the end of the ramrod channel. I used a 1/4" chisel and cut a square face down thru the dowel. Here are a couple photos showing this.

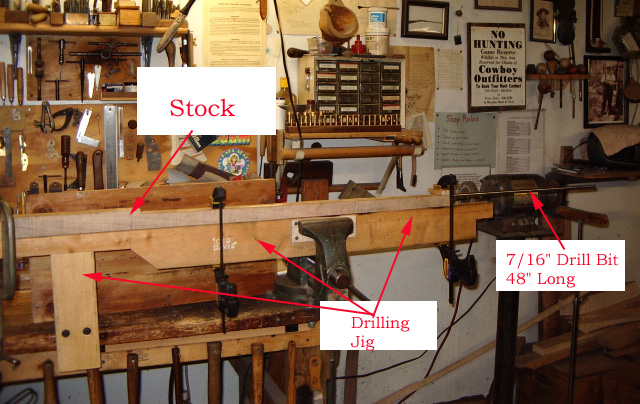
Well I tried to get a couple photos before my camera died on me. I got a photo of the stock in the jig specially made for this operation.
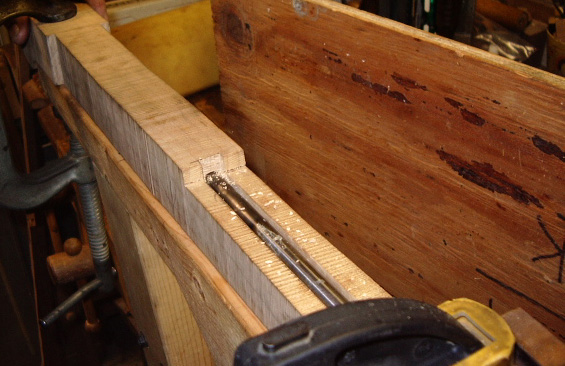 Then
I got a photo of the drill bit boring into the stock. We had to go about
1/8" - 1/4" at a time before we finally got to the end of the drilling
session. Each time the bit was pulled all the way out for each small advancement
of the drill to allow us to blow out the wood chips.
Then
I got a photo of the drill bit boring into the stock. We had to go about
1/8" - 1/4" at a time before we finally got to the end of the drilling
session. Each time the bit was pulled all the way out for each small advancement
of the drill to allow us to blow out the wood chips.
When we were finished, the hole looked good. 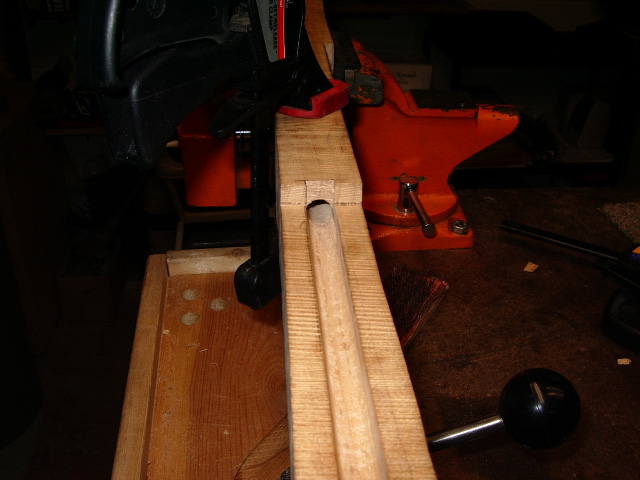
Hoot AL Rifle Shop
If you like the site or have any questions, drop me a line by clicking on "Hoot" below.

(c)
Copyright 2005. All Rights Reserved.