The Ramrod Channel:
To install the ramrod
channel, I determined I wanted a 3/8" ramrod for this gun. I laid out on a
piece of paper how thick I needed the forearm to be in reference to the ramrod,
barrel tenons and the barrel itself. 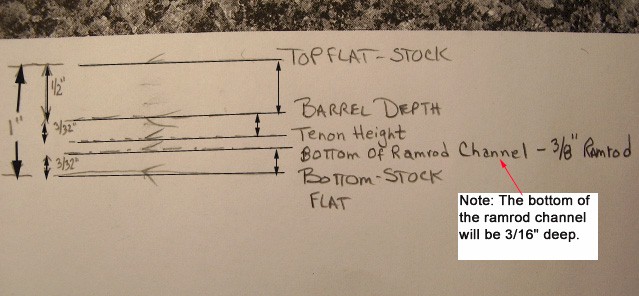
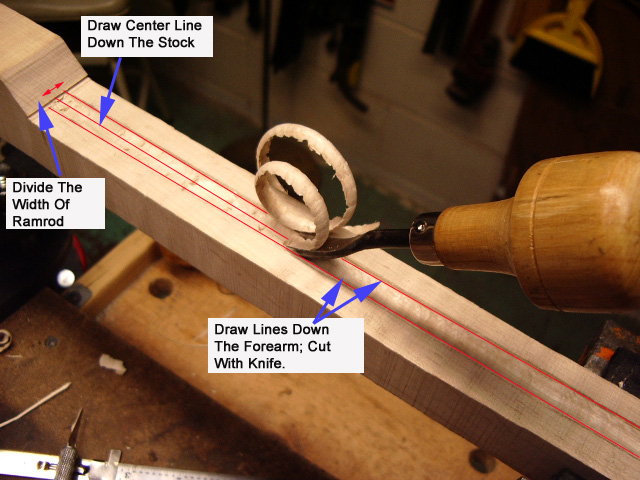
With the forearm thickness approximately 1" thick, I flattened and squared the surface to mark out my dimensions onto the forearm.
After making a few passes with the knife along the edges of the channel, I "V" cut along the inside of the lines. Using a carving tool I removed wood between the lines.
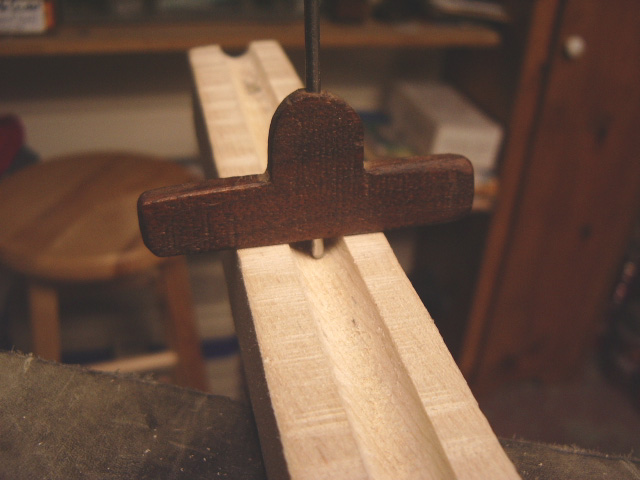
Using a depth gauge, periodically I can check the depth of the groove. I want a depth of 3/16", which is half the depth of the ramrod.
Using a bent round
file, I run this thru the  channel
to finish the groove and even out the ramrod groove.
channel
to finish the groove and even out the ramrod groove.
When close, use a round scraper in the channel to save time.
IMPORTANT NOTE: When you think you are done, make sure the entrance area of the drill rod into the stock is at the proper depth. It is real easy to be distracted by the whole ramrod channel an leave this area not deep enough. This can lift the ramrod drill bit and cause to go astray. Another important note is if you are using a T.O.W. ramrod drill, the drill bit is 13/64" wide. If the channel you just made was 3/8", then the bit may sit up high in the groove. Adjust your groove to fit the 13/64" bit, by taking an ordinary 13/64" bit and use this as a depth gauge along your ramrod groove.
The ramrod hole was drilled and on to the next step. In this case it was building a brass lock.
If you like the site or have any questions, drop me a line by clicking on "Hoot" below

(c) Copyright 2005. All Rights Reserved.