Inletting The Lock:
 To
inlet the lock, I first inlet the barrel with the drum into the stock. This will
be the starting point to orientating the lock into position. After this
was done, I smoothed out and flattened the lock side panel prior to inletting.
You must note, here this is a swamped barrel, so the sideplate panel will be
slightly tapered from back to front. I used a ruler to ensue the side was flat
and a square to ensue the top was square to the bottom of the stock.
To
inlet the lock, I first inlet the barrel with the drum into the stock. This will
be the starting point to orientating the lock into position. After this
was done, I smoothed out and flattened the lock side panel prior to inletting.
You must note, here this is a swamped barrel, so the sideplate panel will be
slightly tapered from back to front. I used a ruler to ensue the side was flat
and a square to ensue the top was square to the bottom of the stock.
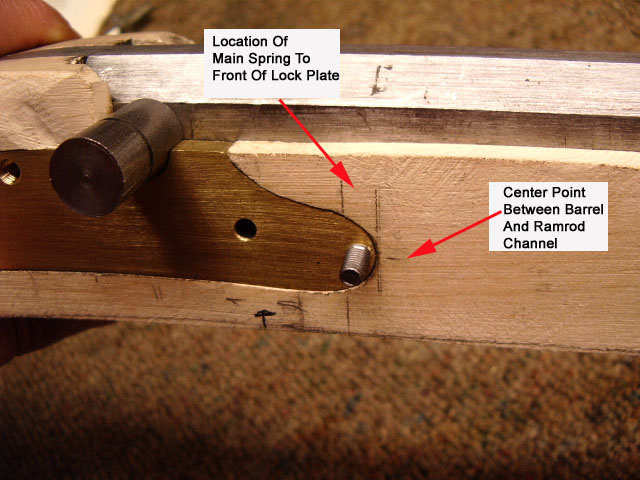
The lock was then position directly under the 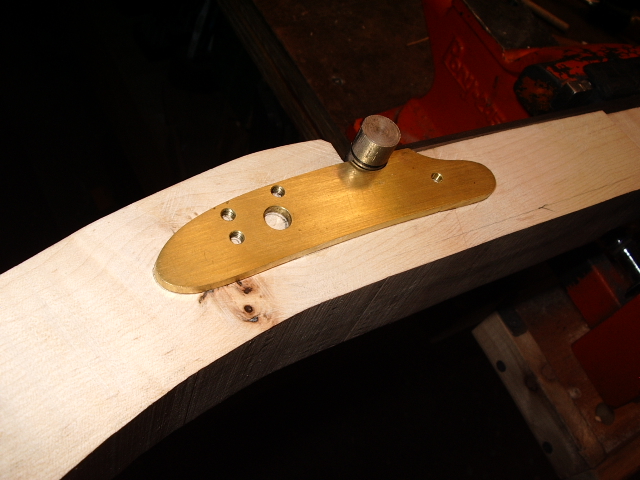 drum.
The front bolster was positioned at the halfway depth of the side barrel flat in
front of the drum. This helped position the rest of the lock properly on the
wrist. In the photo to the right, the lock bolster is already inlet into
the stock and a knife was used around the perimeter of the lock to make for the
initial inletting of the lock.
drum.
The front bolster was positioned at the halfway depth of the side barrel flat in
front of the drum. This helped position the rest of the lock properly on the
wrist. In the photo to the right, the lock bolster is already inlet into
the stock and a knife was used around the perimeter of the lock to make for the
initial inletting of the lock.
Note, I used a piece of scrap brass the same thickness as the bolster to balance out the lock so I could mark the location of the bolster. Using a chisel and knives, I took out enough wood to allow the bolster to seat fully into the stock and allow the lock to lay flat to the stock.
The lock plate is now inlet into the stock. To make sure the lock was tight against the barrel, I tried to slide a piece of thin paper between the bolster and the barrel. When the paper would not pass, I was down. Used a square across the face to make sure it was flat and not tilted.
Located where I wanted the lock screw to be on
the rear tail of the bolster. I wanted a #10 bolt at this location. I positioned
the hole back far enough, yet have enough "meat" around the hole for
the bolt to bite into. First step was to drill the hole into the bolster of the
lock with a #21 drill bit. Installed the lock plate on the stock and then used
this hole as a pilot hole to again use  the
#21 bit to drill thru the stock and the rear tang of the barrel to the other
side. Removed the lock plate and then drilled a 13/64" clearance hole for
the bolt.
the
#21 bit to drill thru the stock and the rear tang of the barrel to the other
side. Removed the lock plate and then drilled a 13/64" clearance hole for
the bolt.
Then I removed the barrel and used a round
file to 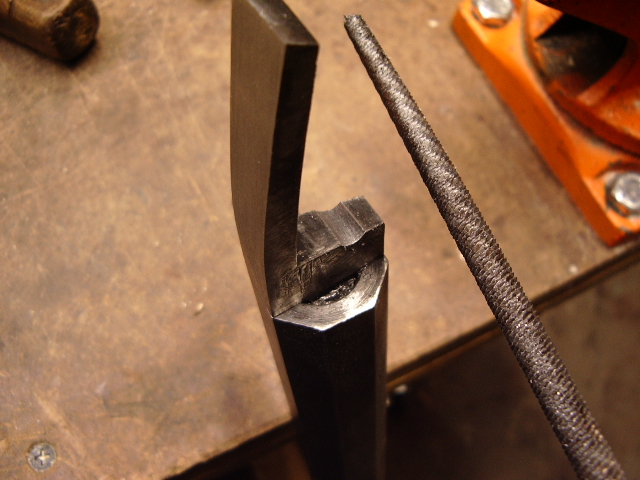 open
up the trench on the backside of the tang. Installed the lock plate into the
stock and Inserted a 10X32 tap and tapped the hole in the lock plate bolster.
Trimmed the length of the lock bolt down, and rounded the end of the bolt
protruding.
open
up the trench on the backside of the tang. Installed the lock plate into the
stock and Inserted a 10X32 tap and tapped the hole in the lock plate bolster.
Trimmed the length of the lock bolt down, and rounded the end of the bolt
protruding.
Using a pencil, I drew circles thru the holes
in the lock plate where the tumbler, bridle bolt holes and the sear bolt hole
were located. Also drew a circle where the front main spring pin protrudes to
allow for alignment of the front main spring for inletting 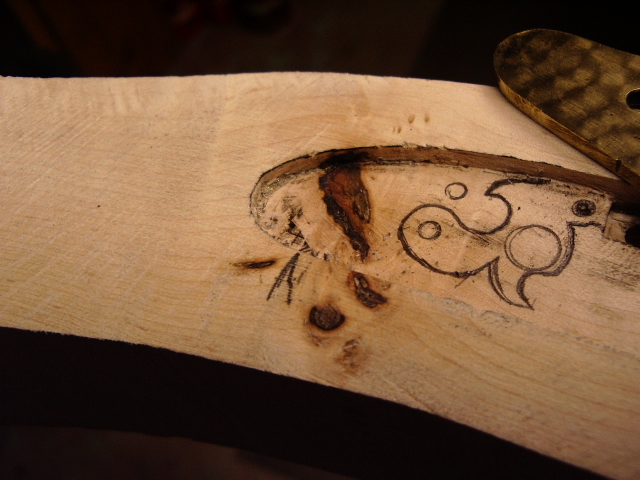 later.
Note when I inlet the lock plate, large bark inclusion appeared out of no
where. These things happen. Immediately I started soaking the area with Crazy
Glue for wood/leather. This is some pretty thin stuff and the wood soaks it up
like water. I would let it harden and keep filling the area. By doing so the
wood hardens and makes it easier to work with and does not chip out. Great
stuff it is!!
later.
Note when I inlet the lock plate, large bark inclusion appeared out of no
where. These things happen. Immediately I started soaking the area with Crazy
Glue for wood/leather. This is some pretty thin stuff and the wood soaks it up
like water. I would let it harden and keep filling the area. By doing so the
wood hardens and makes it easier to work with and does not chip out. Great
stuff it is!!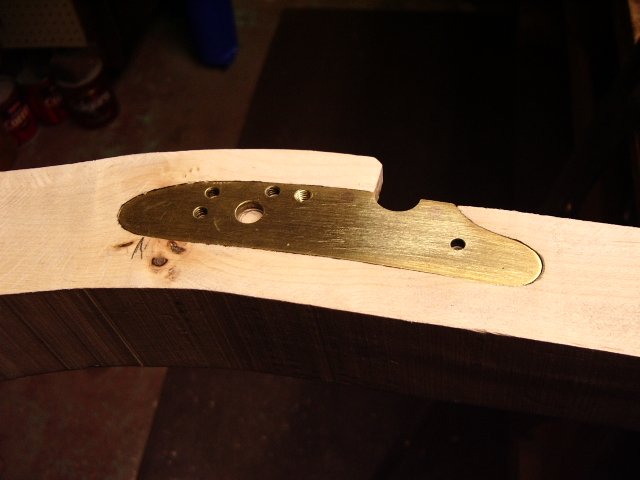
With the marks for the bridle on the inside, I laid the bridle out and traced around it. I could also align the sear with the sear bolt hole location to give me an idea where the sear hole will need to be drilled later, too. Next steps is the start inletting the lock assembly.
 The
lock as inletted into the stock and then
the front side plate bolt was installed. Here is a photo showing the bolt is
already installed with the marking on the outside of the lock panel.
The
lock as inletted into the stock and then
the front side plate bolt was installed. Here is a photo showing the bolt is
already installed with the marking on the outside of the lock panel. 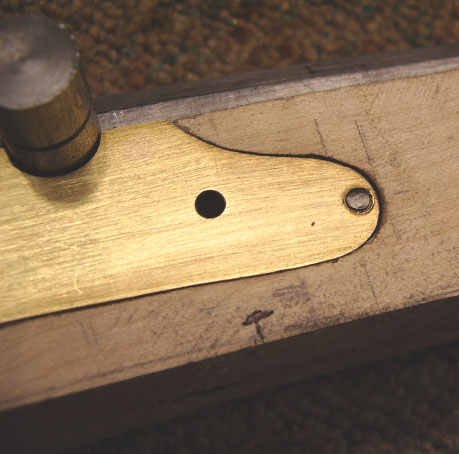 For
more information on how to locate the front side plate bolt see this link: Inlet
Lock Front Side Plate Bolt. (Look toward the bottom of the page.)
For
more information on how to locate the front side plate bolt see this link: Inlet
Lock Front Side Plate Bolt. (Look toward the bottom of the page.)
Then the bolt was cut down and rounded over.
Here is what the inside of the inletted lock
cavity looks like. Also, you can see when the front side plate bolt clearance
hole was drilled, it cut into the lock cavity. The bolt misses 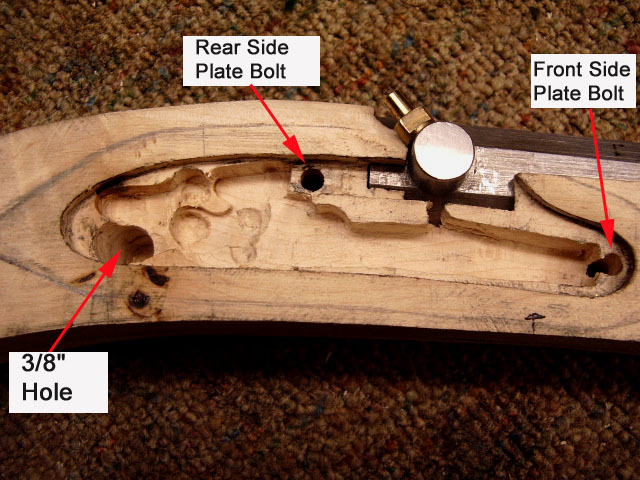 the
main spring by 1/16". I used a #10 for the rear bolt and used a #8 for the
front side plate bolt. This makes it easier to reassemble the gun later. You
will also note, I drilled the sear hole with a 3/8" bit. this was done
prior to inletting the sear spring and sear. The parts were laid out
inside the lock cavity and made it easy to determine the sears'
location.
the
main spring by 1/16". I used a #10 for the rear bolt and used a #8 for the
front side plate bolt. This makes it easier to reassemble the gun later. You
will also note, I drilled the sear hole with a 3/8" bit. this was done
prior to inletting the sear spring and sear. The parts were laid out
inside the lock cavity and made it easy to determine the sears'
location.
To install the nipple, I cut a piece of
1/8" dowel 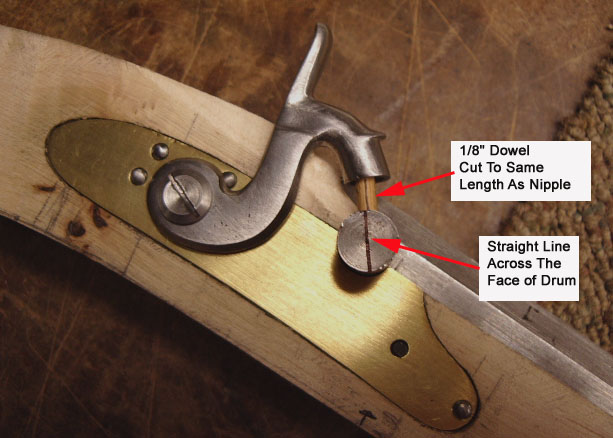 the
same length as my nipple. Placed the dowel under the hammer to determine the
best location for the nipple. Then drew a line across the face of the drum to
use my drum drilling jig.
the
same length as my nipple. Placed the dowel under the hammer to determine the
best location for the nipple. Then drew a line across the face of the drum to
use my drum drilling jig.
Here is the lock with the nipple installed.
The hammer falls flat onto the nipple.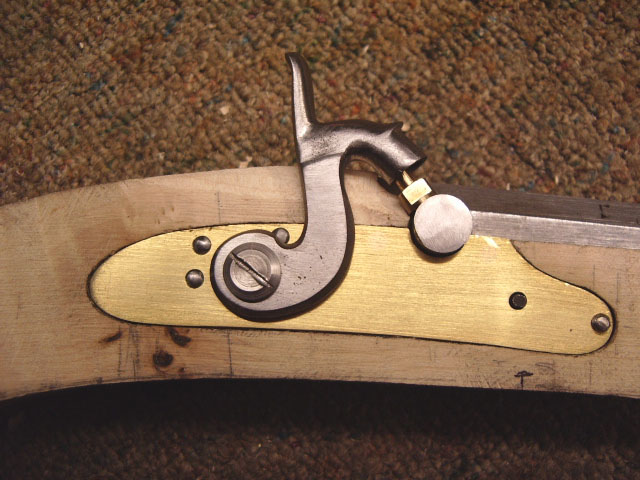
Now onto installing the triggerguard.
If you like the site or have any questions, drop me a line by clicking on "Hoot" below

(c) Copyright 2005. All Rights Reserved.