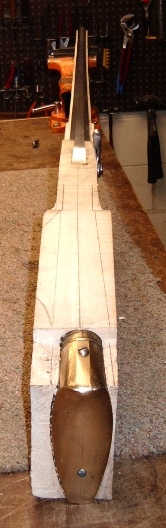
Butt Plate Installation:
The center of butt plate was marked
on the top of the upper heel extension. Also a  center
line extending from the barrel was drawn from the front of the comb across
the top of stock. The butt plate was positioned away from the stock center line
1/4". This will give the gun cast off. By doing this, it brings the barrel
over toward the shooter and they do not have to lean their head over as much to
see the sights better.
center
line extending from the barrel was drawn from the front of the comb across
the top of stock. The butt plate was positioned away from the stock center line
1/4". This will give the gun cast off. By doing this, it brings the barrel
over toward the shooter and they do not have to lean their head over as much to
see the sights better.
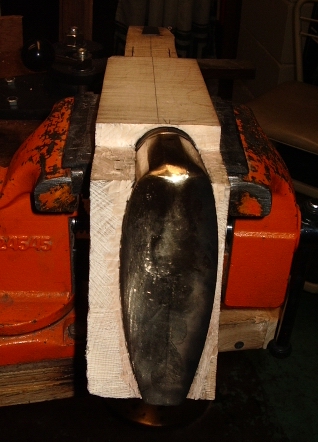
Candle soot was used on the heel of
the butt plate to blacken it. You want to have the heel be flat by inletting the
heel downward till you have good solid lines. 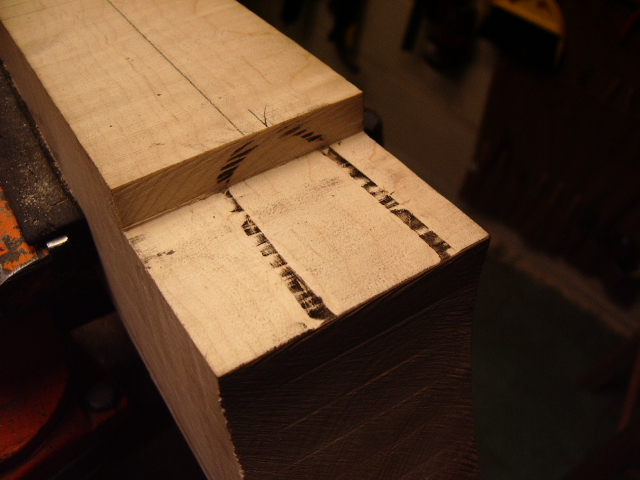
Make sure the butt plate is perpendicular to the top of the stock when inletting it down into position.
 Then
you will start working the heel forward into the stock.
Then
you will start working the heel forward into the stock.

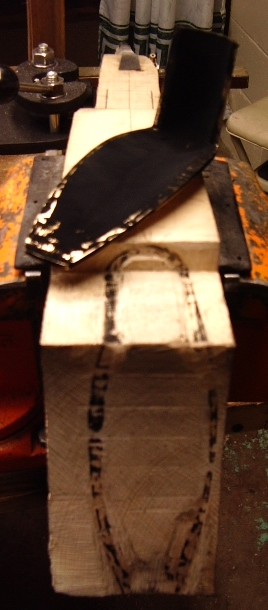 Continue
doing this until you have a good seat of the heel on stock and you have started
making marks on the rear of the stock with the butt plate. Continue doing so
until you have marks around the perimeter of the plate. (Note, when striking the
plate, keep your blows high on plate and do not strike the toe area. This area
will flex when you strike it and can give you false marks on the stock.)
Continue
doing this until you have a good seat of the heel on stock and you have started
making marks on the rear of the stock with the butt plate. Continue doing so
until you have marks around the perimeter of the plate. (Note, when striking the
plate, keep your blows high on plate and do not strike the toe area. This area
will flex when you strike it and can give you false marks on the stock.)
With a good line around the perimeter of the plate on the stock, you will now need to mark the location of the top screw to mount the plate. The top screw will be located 1/3 the way back from the front face of the heel. Then with the plate not on the stock, I use a 1/16" drill bit and drill a hole in the butt plate at this mark. The butt plate is positioned onto the stock and I use the same bit thru the pilot hole in the butt plate to gently mark the stock. Remove the plate and then drill a hole that is 1/32" in front of this hole. This will force the screw to pull the butt plate forward into the stock.
 The
butt plate was removed from the stock an a
The
butt plate was removed from the stock an a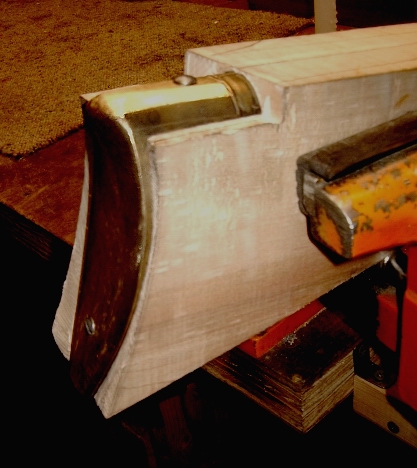 clearance hole for the screw is drilled. Then this hole is beveled for the
mounting screw. I used a #8 screw. With this screw in place, I then placed
a center line down the butt plate and marked the location for the lower toe
mounting screw. This was approximately 1-1/4" up from the bottom of
the toe.
clearance hole for the screw is drilled. Then this hole is beveled for the
mounting screw. I used a #8 screw. With this screw in place, I then placed
a center line down the butt plate and marked the location for the lower toe
mounting screw. This was approximately 1-1/4" up from the bottom of
the toe.
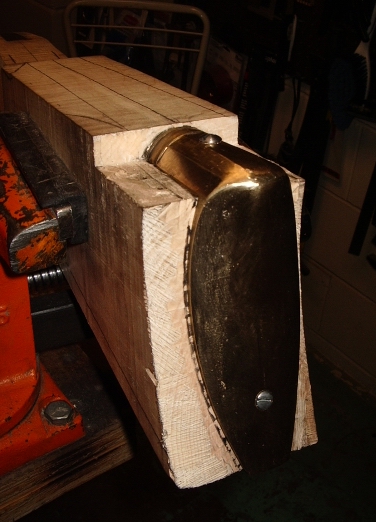
Here you can see the "Cast Off" on
the stock with the butt plate mounted.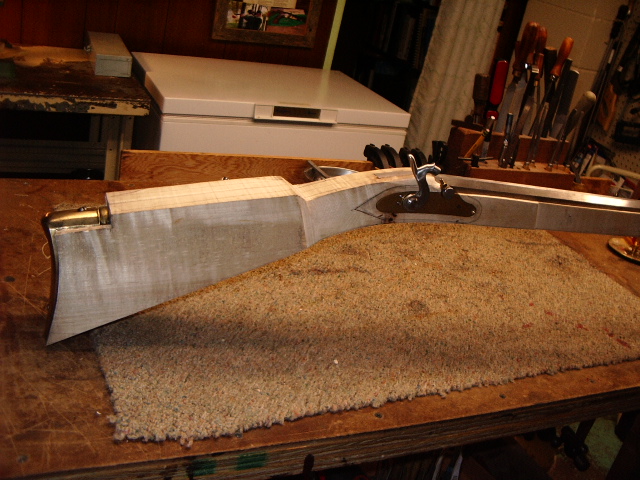
 With
the butt plate installed, now I can return to installing the trigger plate and
then button it up with the tang bolt.
With
the butt plate installed, now I can return to installing the trigger plate and
then button it up with the tang bolt.
See Triggers and Triggerguard Installation:
If you like the site or have any questions, drop me a line by clicking on "Hoot" below

(c) Copyright 2005. All Rights Reserved.