Pouring The Nose Cap: (Click photos for larger view)
 The
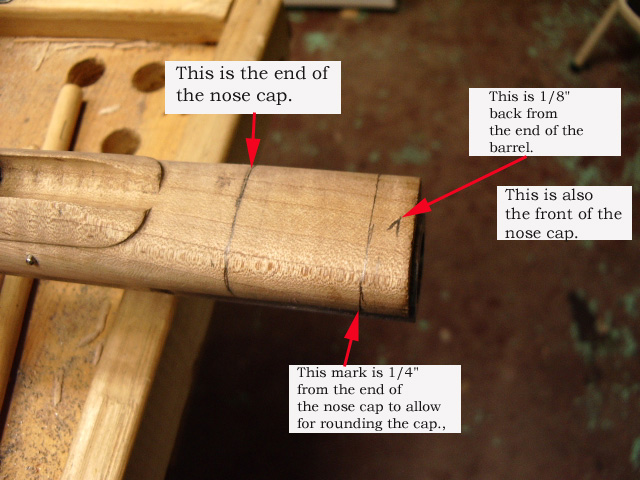
nose cap will be 1/8" down from the muzzle of the barrel. The length of the
cap approximately 1-5/16" long. It will be a simple nose cap, since these
were solid nose caps for this time period.
The
nose cap will be 1/8" down from the muzzle of the barrel. The length of the
cap approximately 1-5/16" long. It will be a simple nose cap, since these
were solid nose caps for this time period.
Once the end of the nose cap was identified, a mark was made 1/4" farther back. This will be where the end of the stock will be cut flush.
 Using
a small toothed saw, I measured the depth of 3/32" fro
Using
a small toothed saw, I measured the depth of 3/32" fro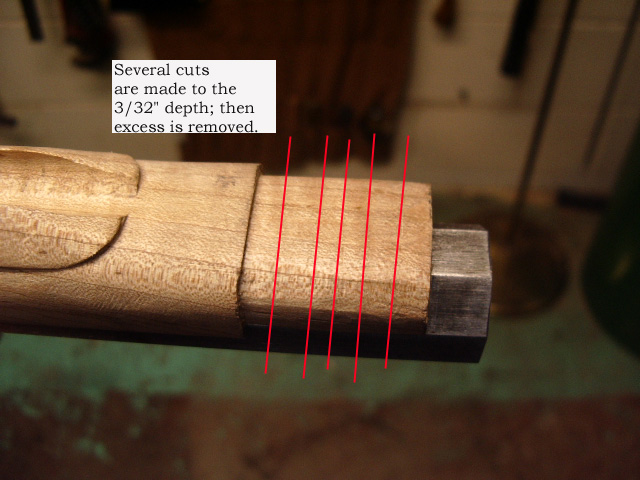 m
the edge and made a mark. Then drew a line parallel with the saw toothed edge.
This served as a depth gauge for the cuts made into the stock. I made a series
of parallel cuts about 1/8" apart, then used a chisel to remove the excess
wood. The depth of the cuts made it easy to maintain the proper the depth.
m
the edge and made a mark. Then drew a line parallel with the saw toothed edge.
This served as a depth gauge for the cuts made into the stock. I made a series
of parallel cuts about 1/8" apart, then used a chisel to remove the excess
wood. The depth of the cuts made it easy to maintain the proper the depth.
With the excess wood removed, I then cut off
the barrel side panels on either side of the nose cap. This will allow metal to
flow and fill this area fully when the cap is poured. 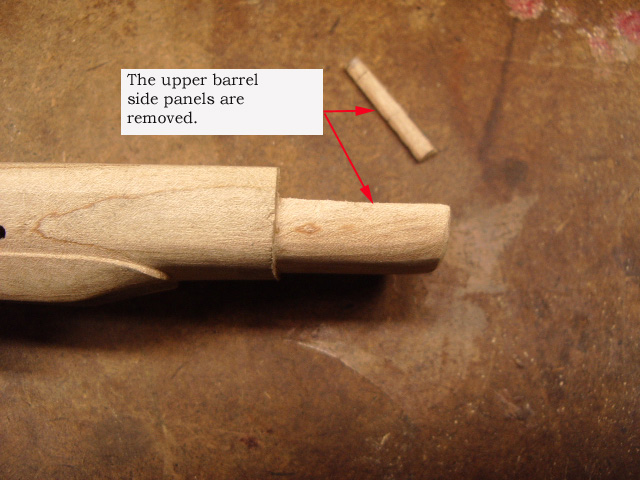
Next I used a 3/32" drill bill and
drilled a series of holes into the nose cap area. Then I used a slightly larger
drill bit to bevel the hole on either end. This will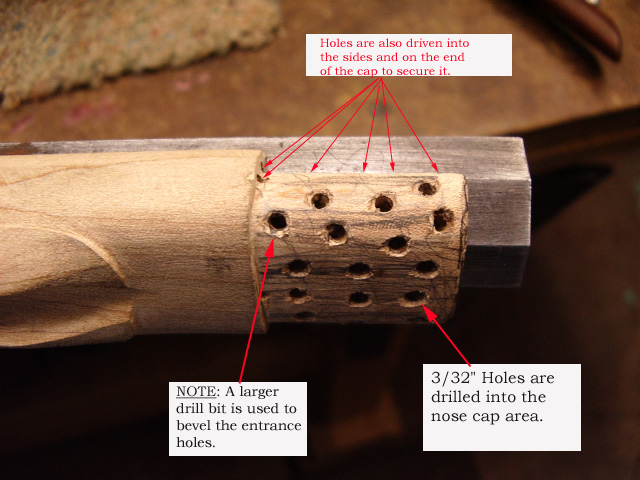 aid the flow of the metal and form rivets on the other side to lock the nose cap
to the stock.
aid the flow of the metal and form rivets on the other side to lock the nose cap
to the stock.
Now I put the ramrod into the stock and used
masking tape to cover all exposed holes in the stock. This was done to prevent
any metal from accidentally being poured into parts of the gun it is not
intended to go into.
Using index stock paper or thin cardboard,
wrap the nose cap area. Before fully taping the mold into place, check for a
uniform gap between the wood and the  a
cardboard. If the wood is not evenly gapped, remove the cardboard and remove the
excess wood.
a
cardboard. If the wood is not evenly gapped, remove the cardboard and remove the
excess wood.
Once you are satisfied, wrap the area with
tape several times and make sure the wooden plug for the barrel is securely into
the end of the barrel. 
Heat the pewter up until the metal flows smoothly. Do not over heat as you do not want to scorch the wood when you pour the metal into the casting you made. When you pour the molten metal into the casting, I use a rubber mallet and repeatedly tap the barrel. This vibration assists the metal flowing thru out the casting and prevents any air bubbles or gaps in the casting.
Here is what it looks like after the metal has
cooled after a couple minutes and the casting cardboard is removed. Note, here I
used a ruler and continued the top of the stock barrel channel, then cut off the
excess metal already. 
Once the excess metal has been removed from the sides, remove the barrel from the stock. Now you can see the inside of the nose cap area. Note, the rivets formed on the inside of the stock. You must also, remove the excess metal from the end of the stock, too. I used a hacksaw to do this.
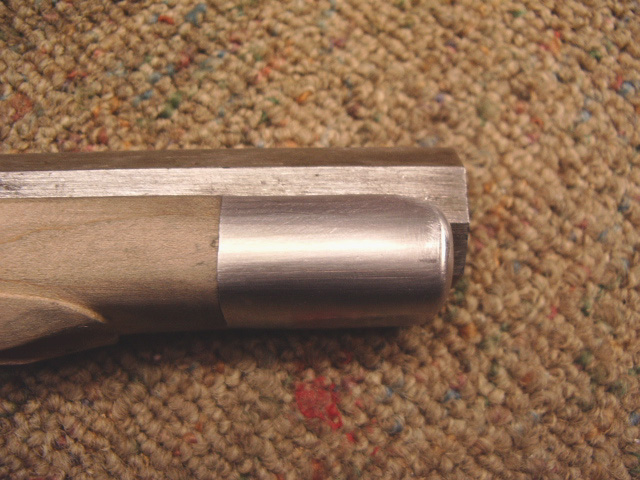
With the barrel still out of the stock, I put the stock into the shop vise and then I rounded the sides and the end of the nose cap using my bastard files to eventually my finer files. You will notice you will have to clean the files often a metal particles will build up in the files. you will know this when you start seeing scratches in the surface you are filing. Use a metal scribe or your knife to flick this metal out of the files along with using your file brush.
Here are photos of the completed nose cap below:
Hoot AL Rifle Shop
If you like the site or have any questions, drop me a line by clicking on "Hoot" below.

(c)
Copyright 2005. All Rights Reserved.