Installing
Patchbox: 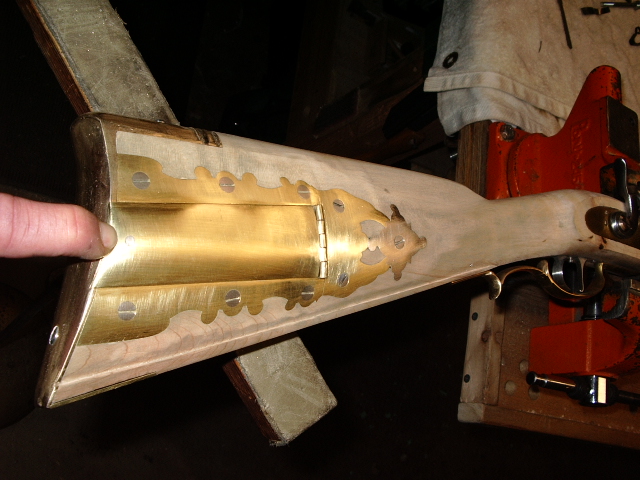
In this segment I will be preparing the patchbox to add a piece of silver to the finial and then installing the patchbox onto the rifle. Then I will continue to add a push rod to latch the lid and a make a lid spring to force open the lid when the push rod is depressed.
Here is little movie of the pushrod opening the patchbox lid : Video
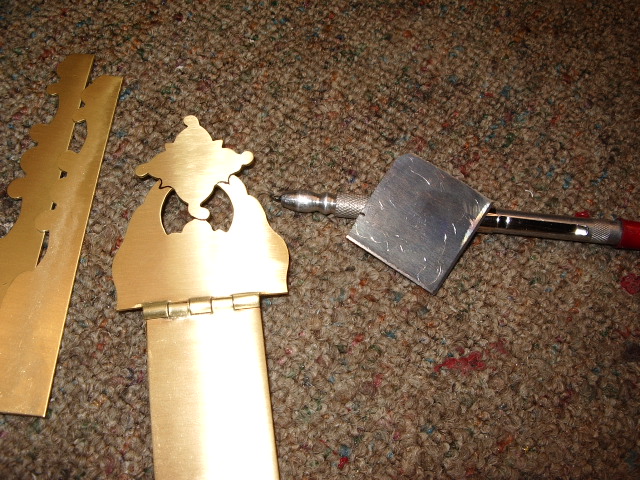
To start with, I cut out a piece of silver the size of the floral on the end of the finial.
Then I traced out the floral onto the silver piece and filled in the missing lines. This was cut out to match the floral on the finial.
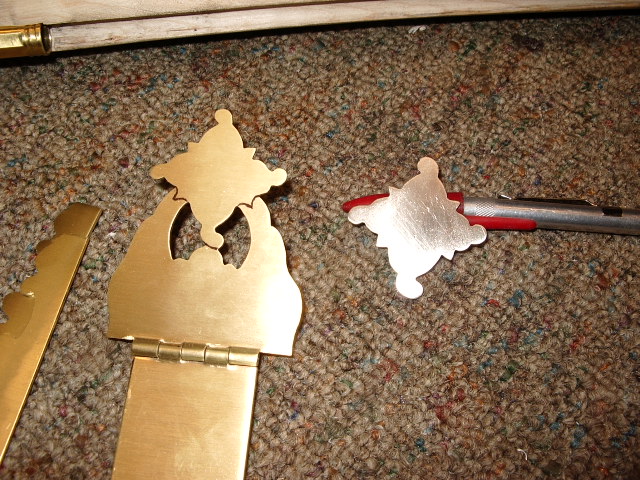
 Next I put black
magic marks on the finial and laid the silver piece over the brass finial, and
traced the silver piece onto the brass. This indicated to me where I needed to
cut the brass for the silver piece to fit.
Next I put black
magic marks on the finial and laid the silver piece over the brass finial, and
traced the silver piece onto the brass. This indicated to me where I needed to
cut the brass for the silver piece to fit.
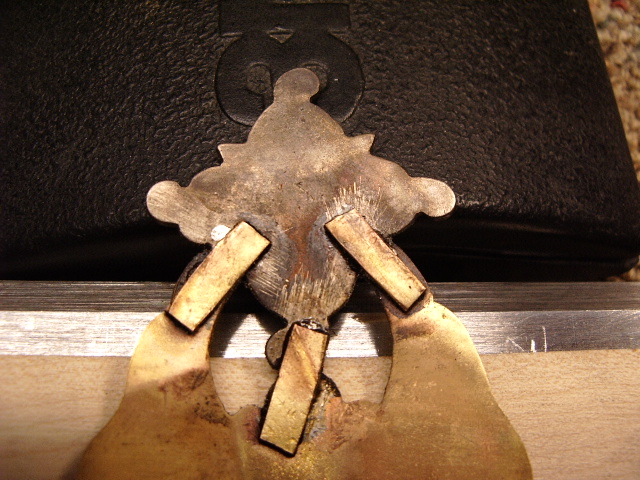
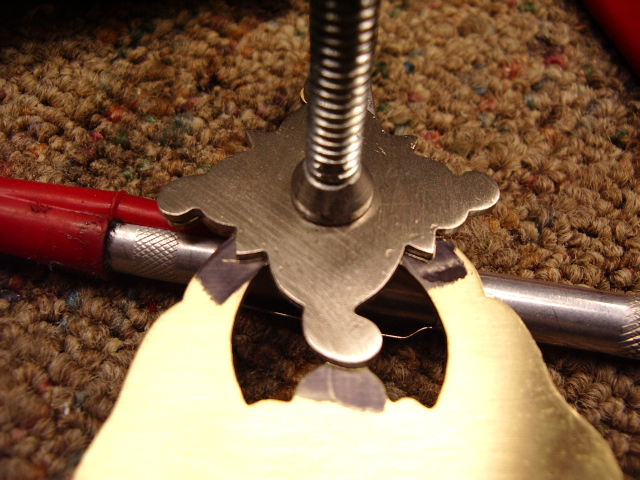
After the brass was cut and the silver piece filed and fitted to mate with the brass piece, I cut small strips of brass to serve as backing to support the junctions and serve as soldering bases.
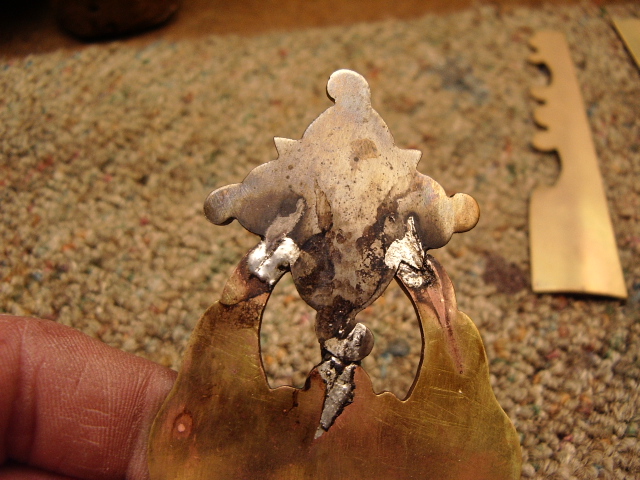
I used spring clamps to hold the pieces together so as the solder heated up, the spring clamps would compress the pieces of metal together. The front looked pretty bad before I cleaned it up.
Once this was cleaned up, I then drilled holes into the finial to mount the patchbox onto the stock with #6 screws. I used the Golden Means to locate the location of the patchbox onto the stock. As a result, the lid is 3/5's the length of the overall length of the patchbox length.
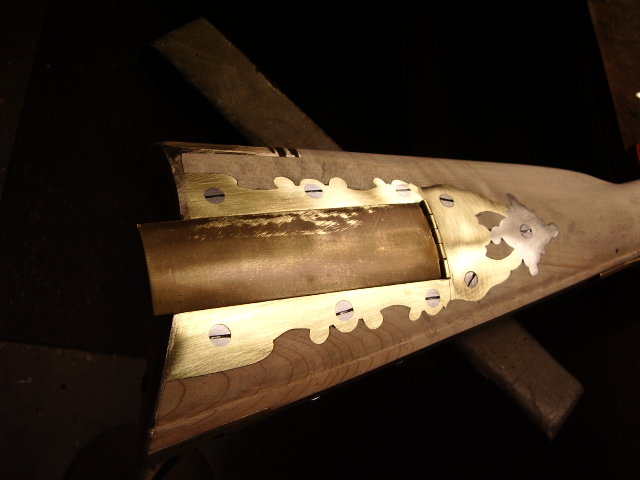
The patch box was formed into shape using a piece of maple I had previously shaped to the contour of the stock. With the brass annealed, it took the shape easily.
Now with the screws
into the final, I can trace the finial with my knife and started to inlet 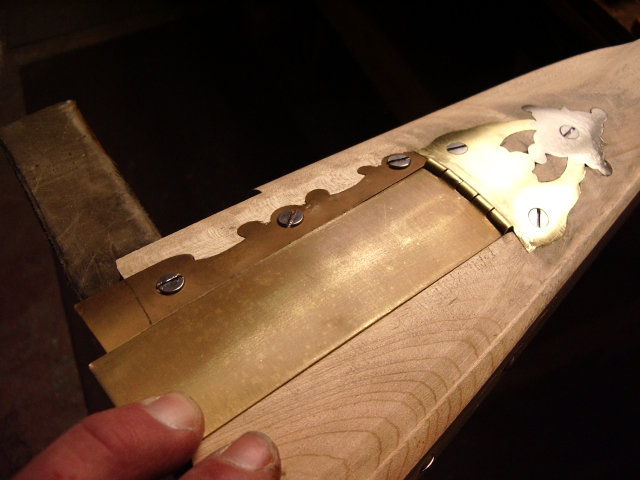 the
finial into the stock.
the
finial into the stock. 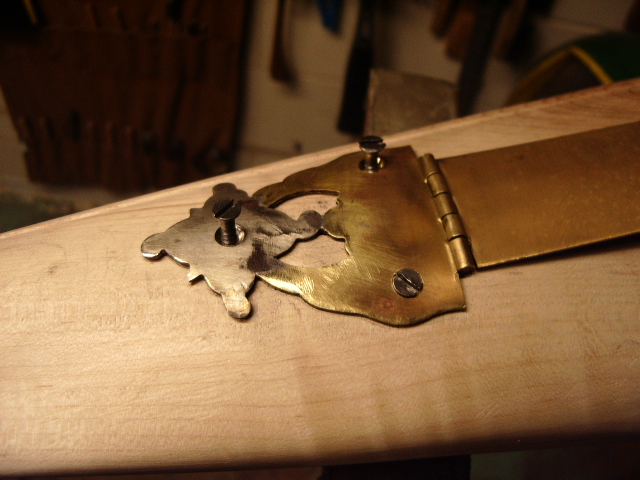
With the final inlet, I raised it slightly and then cut on either side of the lid and inletted the lid down. When the lid was inletted, I inletted one of the side finials.
 With the top finial
inletted, I repeated the process
With the top finial
inletted, I repeated the process  with the lower finial.
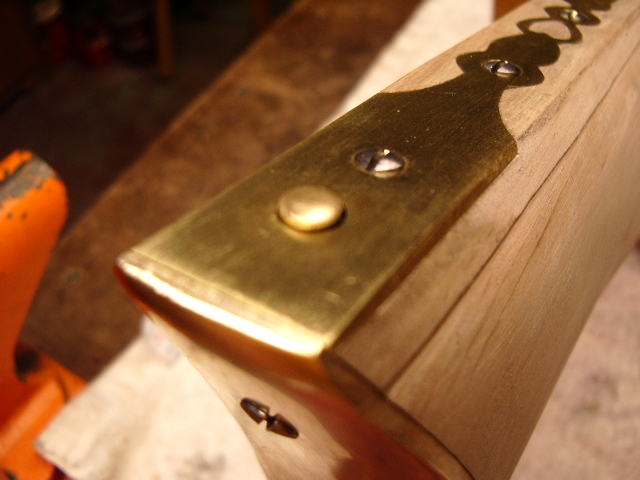
Here is how the patchbox looked with all three pieces finally inletted.
Note, I have countersunk all the screw heads, but have not filed them off yet. So far I have only filed the top finial to the surface.
 With the lid lifted,
I filed the upper and lower
With the lid lifted,
I filed the upper and lower 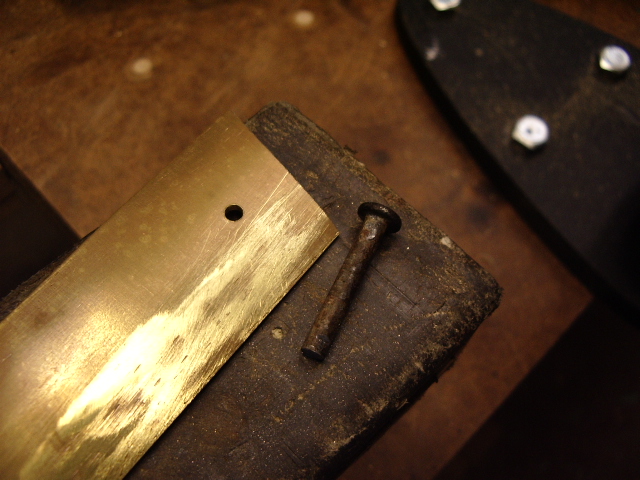 finials flush to the wood.
With the patchbox nearly finished, I wanted to make a catch for the lid. In this case, I found a 16 gauge nail and cut it to about 3/4" long.
 Also I drilled an
1/8" hole in the lid about 5/16" in from the edge of the buttplate and
centered on the lid. The nail head was cut off and then I milled the end of the
nail down to fit into the hole in the lid with a length of 1/8".
Also I drilled an
1/8" hole in the lid about 5/16" in from the edge of the buttplate and
centered on the lid. The nail head was cut off and then I milled the end of the
nail down to fit into the hole in the lid with a length of 1/8". 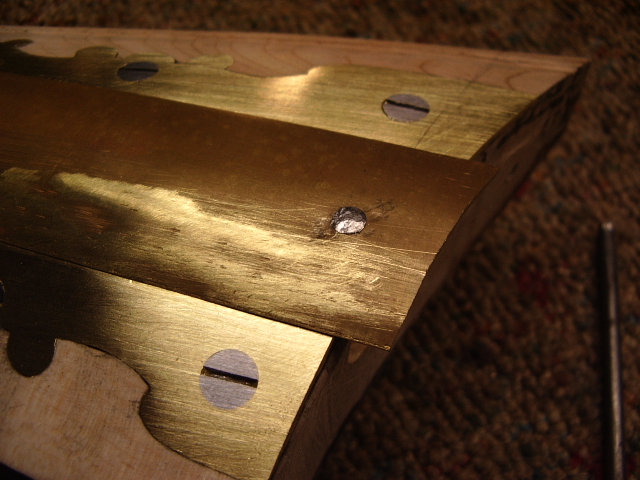
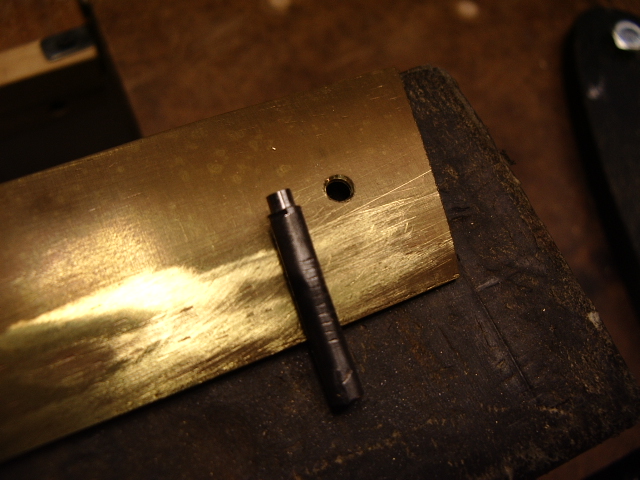
The top of the lid hole was countersunk. I stuck the nail into a metal vise and peened the nail over to fill the countersink. Here is a photo of the peened nail exposed.
Before I took this photo, I laid the lid down and the marked on either side of the nail on the inside of the patchbox and then drilled a 1/4" hole down into the stock. This provided relief to lay the lid down into this position.
With the buttplate removed, I the drilled out a 5/8" diameter hole beneath this hole into the end of the stock. This will be the area for the catch spring and the push rod to interact with the spring to release the latch.
 To drill the push rod
hole, I wanted the push rod to come up from the toeplate. Eventually this will
be disguised as a screw in the toe plate. In order to do this, I had to miss the
rear screw in the lower finial and the lower rear screw
To drill the push rod
hole, I wanted the push rod to come up from the toeplate. Eventually this will
be disguised as a screw in the toe plate. In order to do this, I had to miss the
rear screw in the lower finial and the lower rear screw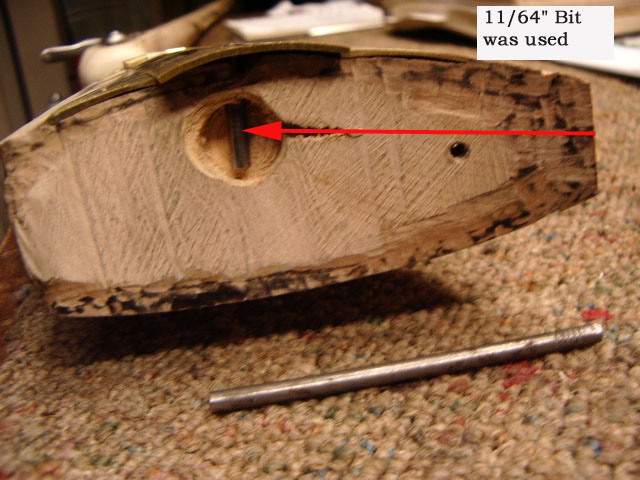 in the buttplate.
I laid a piece of masking tape onto the stock in both positions and drew vertical lines on the masking tape to serve as aids to guide me when I drilled the hole. My push rod is a full 16 gauge nail with the ends cut off.
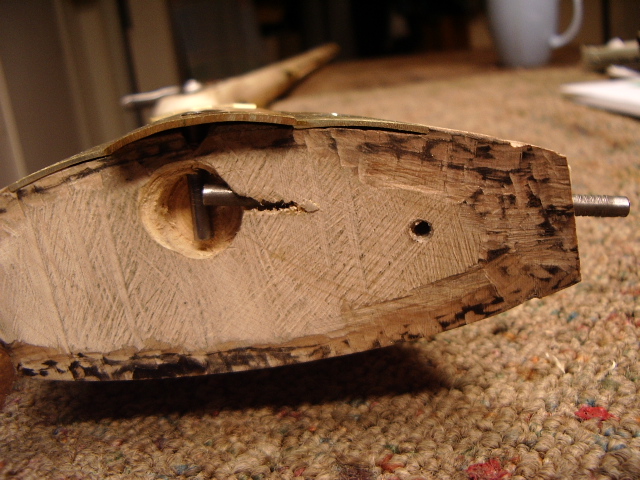 Now the push rod
enters from the side and misses the screws and intersects in the area of the lid
catch.
You will note, the hole partially penetrates under the buttplate. This portion
of the buttplate is normally bowed away from the stock and does not interfere
with the operation of the rod. If you do this and find that the butt plate
slightly interferes with the push rod. Run your drill back down thru the hole
and drill thru the portion of the rear screw that interferes. This will not
damage the screw.
Now the push rod
enters from the side and misses the screws and intersects in the area of the lid
catch.
You will note, the hole partially penetrates under the buttplate. This portion
of the buttplate is normally bowed away from the stock and does not interfere
with the operation of the rod. If you do this and find that the butt plate
slightly interferes with the push rod. Run your drill back down thru the hole
and drill thru the portion of the rear screw that interferes. This will not
damage the screw.
I'm still working on
this portion at this time and have not finished, but will continue to show you the rest of the process as it
unfolds. In the meantime, I tapped down the end of the patch box lid to conform
with the buttplate.
have not finished, but will continue to show you the rest of the process as it
unfolds. In the meantime, I tapped down the end of the patch box lid to conform
with the buttplate.
Next steps will be to make the catch spring, the lid release spring and then the push rod, how it will come thru the toe plate and then making it as best as I can match up with the other screws in the toeplate.
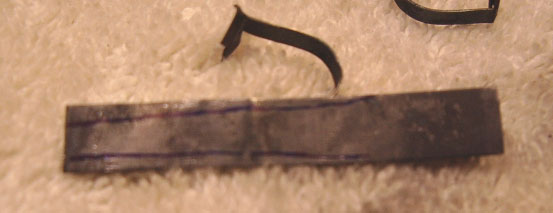
To make the catch
spring, I took a piece of spring steel about 1/2" wide and 1/16"
thick. Length was about 2" long. I de-tempered the steel. Then I shaped the
spring. I failed to get a good photo of it, so made a drawing. (Excuse my
poor artistic abilities. ) The end of the spring that is driven into the wood
was filed to a bevel and sharpened before I tempered the spring. This made a
nice knife edge for driving the spring into the end of the stock. 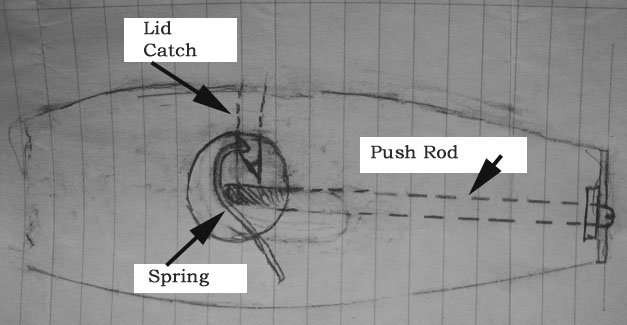
With the spring in place, I painted black
inletting onto the edge of the spring. Held the spring back and lowered the lid
catch into the hole. With the lid fully down, I eased the spring onto the catch.
Held the spring back and then lifted the lid. This left a nice black mark on the
catch indicating where I needed to cut into the catch. File into the catch
about a 1/16" above the mark. Then with trial and error, file a little away
at a time and keep trying the catch until it "clicks" into position. 
Oh, yeah I failed to mention, I added a brass plate to fill the gap between the stock and the butt plate. Drilled a 1/4" hole for the catch. Dresses it up, too. Here you can see the catch filed and the spring in position.
Now I needed to make a lid release spring. I found this old spring from an old garage door opener I had when I lived in Tennessee. De-Tempered the spring, cut the ends off, straightened it and then drew my lines of my spring onto the metal.


Next I shaped the spring into a pattern that would allow the spring to flex and push the lid upward.
I also drilled a 1/8" hole in the end of the spring.
 Then I removed the finial of the patchbox and inlet the spring into the center
of the hinge area. The screw was located under the finial and the spring passed
under the hinge.
Then I removed the finial of the patchbox and inlet the spring into the center
of the hinge area. The screw was located under the finial and the spring passed
under the hinge. 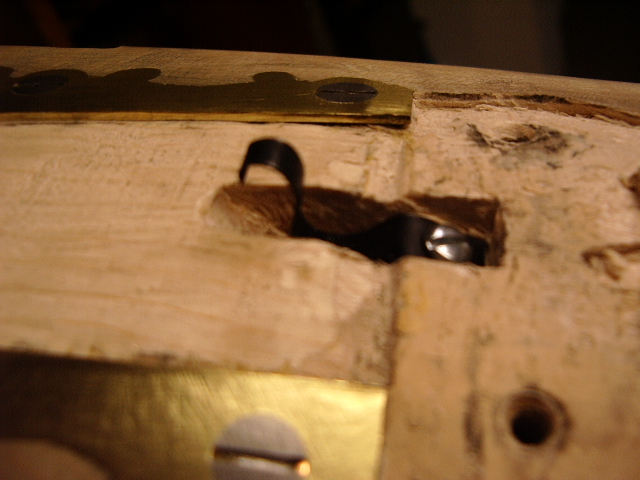
Here is the spring exposed with the patchbox finial reinstalled.
 All I have to do now is drill out the patchbox cavity, but I'll do that later.
Here are a photo of the push rod
coming out of the toe plate.