Installing Forearm Inlay:
 I
patterned an existing forearm inlay my friend
I
patterned an existing forearm inlay my friend 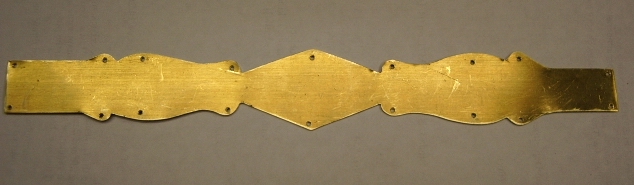 Bookie
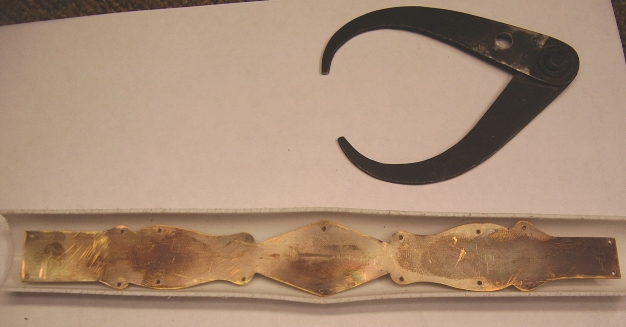
gave me and then modified it for my gun. Cut the pattern out of a
1/16" thick piece of brass. Once the pattern was cut to shape and length, I
then drilled holes along the edge of the inlay.
Bookie
gave me and then modified it for my gun. Cut the pattern out of a
1/16" thick piece of brass. Once the pattern was cut to shape and length, I
then drilled holes along the edge of the inlay.
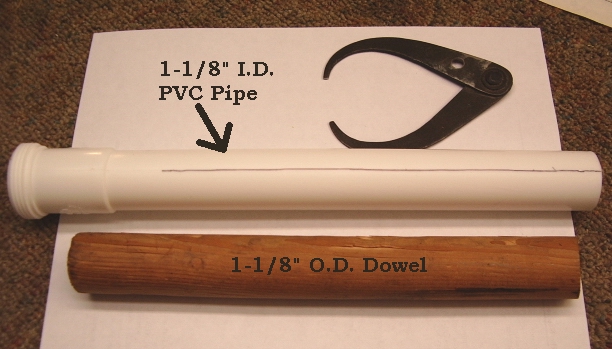 I
need to bend the inlay to conform to the shape of my forearm. So I used my
dividers to determine how thick my forearm was. It measured
1-1/8" thick. Then I picked up a piece of PVC at the hardware store that
had an inside diameter of 1-1/8" and grabbed by 1-/8" wooden
dowel. Next I cut the cuff off the end of the pipe and then cut the pipe
in half lengthwise. This gave me two halves of plastic. The brass inlay
was annealed by heating to red hot and quenched in water.
I
need to bend the inlay to conform to the shape of my forearm. So I used my
dividers to determine how thick my forearm was. It measured
1-1/8" thick. Then I picked up a piece of PVC at the hardware store that
had an inside diameter of 1-1/8" and grabbed by 1-/8" wooden
dowel. Next I cut the cuff off the end of the pipe and then cut the pipe
in half lengthwise. This gave me two halves of plastic. The brass inlay
was annealed by heating to red hot and quenched in water.
 Making
sure I knew which side was up, I took the
Making
sure I knew which side was up, I took the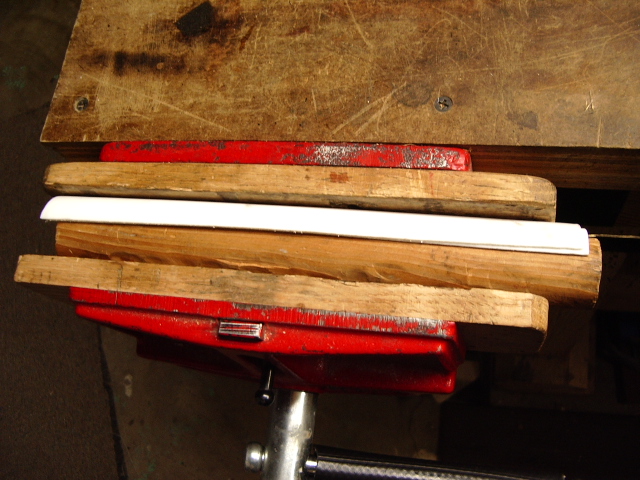 inlay over to the stock and laid it down on the rifle. Then I make
"X's" on the top surface of the inlay. Now the inlay was laid
down with the "X's" facing downward in half of the pipe. Placing
this assembly into the other half of the pipe, I fitted the dowel into the
assembly with the inlay. This whole thing was placed into a vise and the vise
was closed all the way.
inlay over to the stock and laid it down on the rifle. Then I make
"X's" on the top surface of the inlay. Now the inlay was laid
down with the "X's" facing downward in half of the pipe. Placing
this assembly into the other half of the pipe, I fitted the dowel into the
assembly with the inlay. This whole thing was placed into a vise and the vise
was closed all the way.
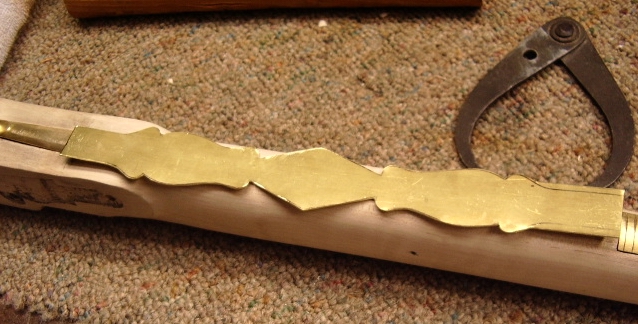
 When
the vise was opened, the inlay was removed from the inside of the pipe and then
fitted to the under belly of the forearm. As you can see, it fit pretty
good.
When
the vise was opened, the inlay was removed from the inside of the pipe and then
fitted to the under belly of the forearm. As you can see, it fit pretty
good.

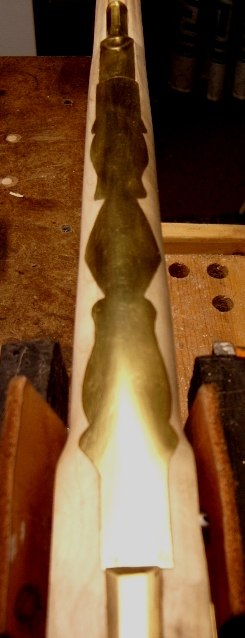
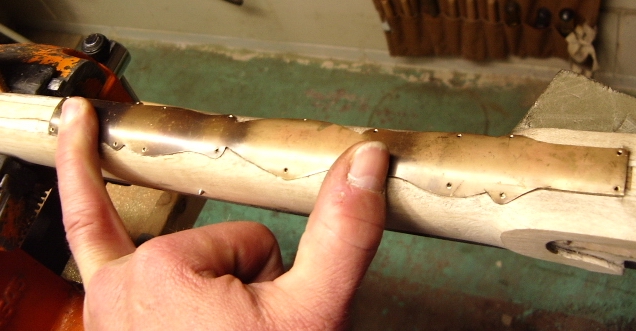
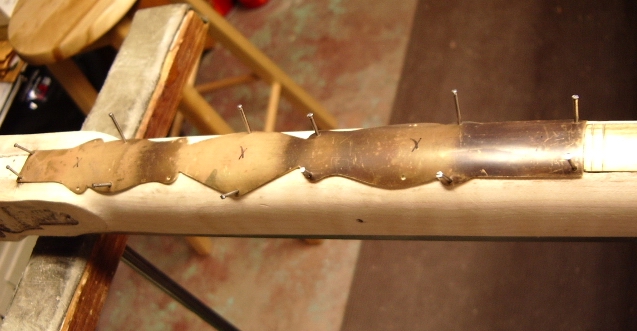 With
the inlay positioned exactly where I wanted it, I then used brad nails to hold
the inlay temporarily. This allowed me to use my knife to cut out the stock for
the inlay. NOTE: Cut straight down (vertically) not from the side. You want the
inlay to drop down into the stock. To the right, you can see you only inlet it a
1/16" deep. Use candle soot under the inlay to show you where excess wood
needs to be removed.
With
the inlay positioned exactly where I wanted it, I then used brad nails to hold
the inlay temporarily. This allowed me to use my knife to cut out the stock for
the inlay. NOTE: Cut straight down (vertically) not from the side. You want the
inlay to drop down into the stock. To the right, you can see you only inlet it a
1/16" deep. Use candle soot under the inlay to show you where excess wood
needs to be removed.
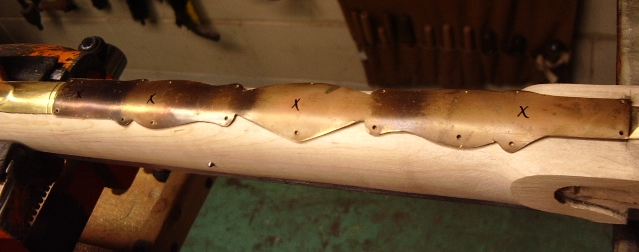
 Here
the inlay is finally inlet into the stock. Now
Here
the inlay is finally inlet into the stock. Now 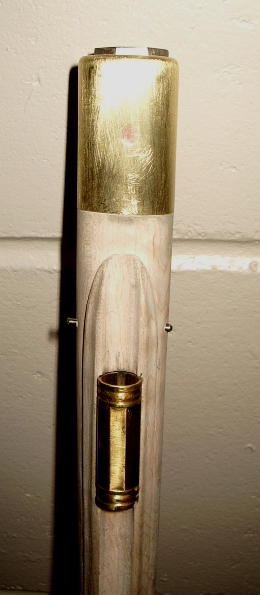 you
want to countersink all the mounting holes on the top of the inlay.
you
want to countersink all the mounting holes on the top of the inlay.
Using 3/8" long brass brads, I nailed the inlay into the inletted area. Then I filed the brass down to the stock.
Below are the results of the finished product.