Carvings On The Stock:
Here is a little incised carving I
put on either side of the stock at the rear thimble: 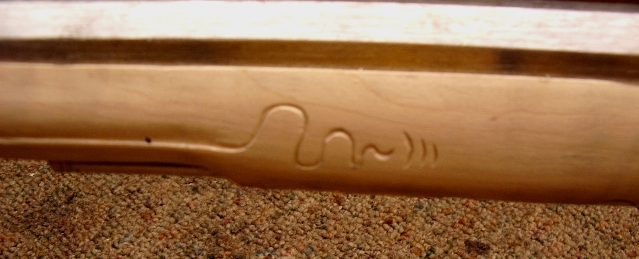
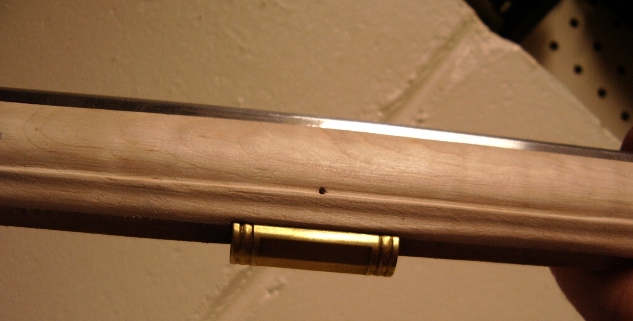
I also shaped the forearm along either side of the ramrod channel:
Now I ready to draw out my Rococo designs on the butt stock of the rifle. I left extra wood in this area for this purpose. Have to admit I drew several designs over period of several days before I came up with something I liked. Hope you like it too.
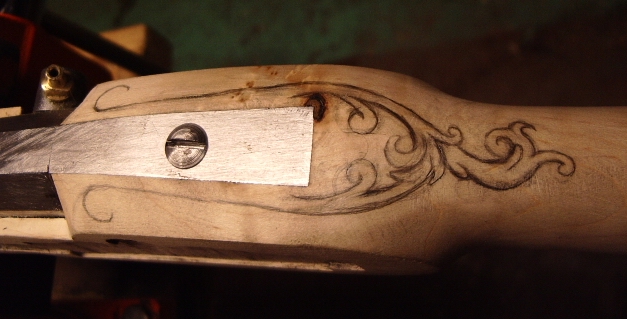
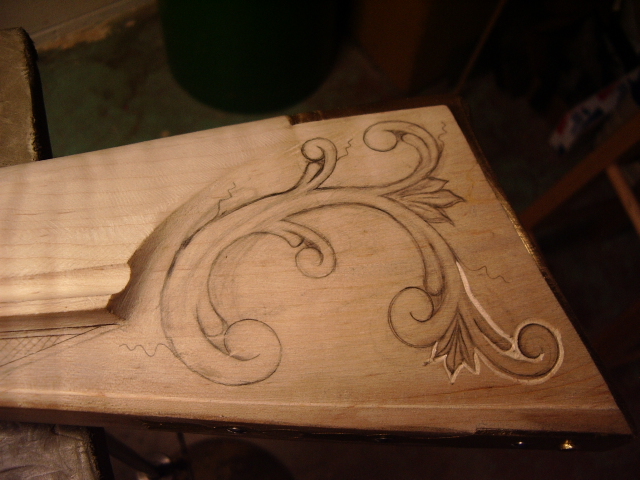 After I drew the design, I used my smallest
"V" gouge and outlined the carvings.
After I drew the design, I used my smallest
"V" gouge and outlined the carvings.
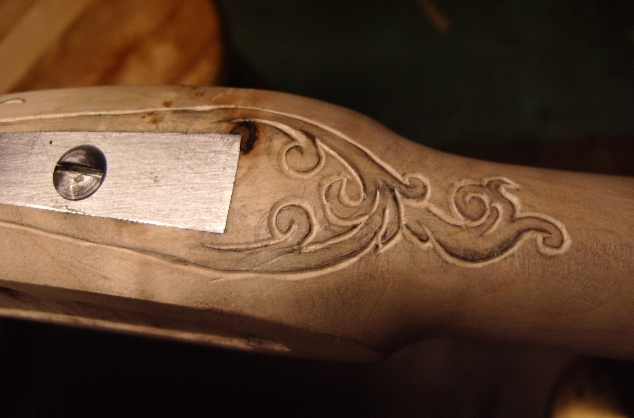
Then I removed the background with a very
sharp 1/4" knife and shaved the wood away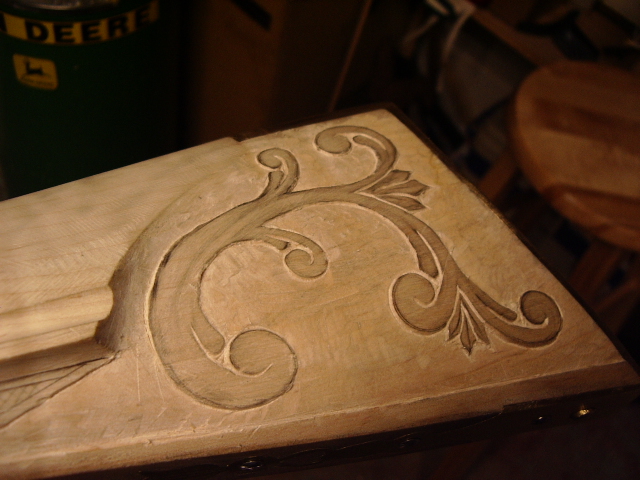 from the carvings.
Then I drew center lines inside the scrolls. 
Now I could start to shape the scrolls and the
carvings to the centerlines. Note, the centerlines were not parallel to
the outer edge. These are "C"s and "S"s and by tapering, you
give the effect of being as thou it is a plant. 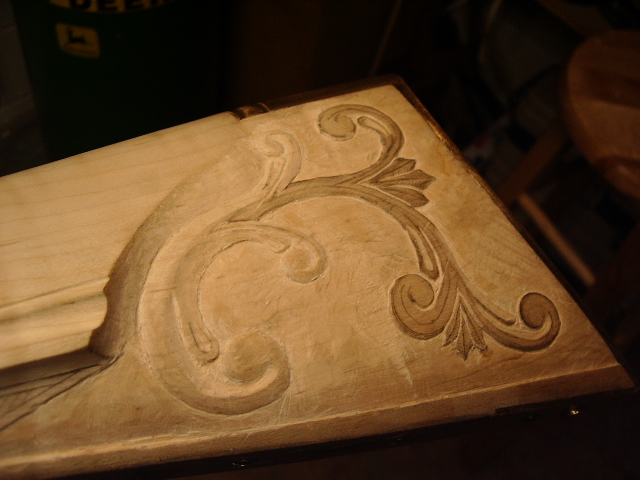

Continue this for the remainder of the carving. At this point the carving is still in rough state.
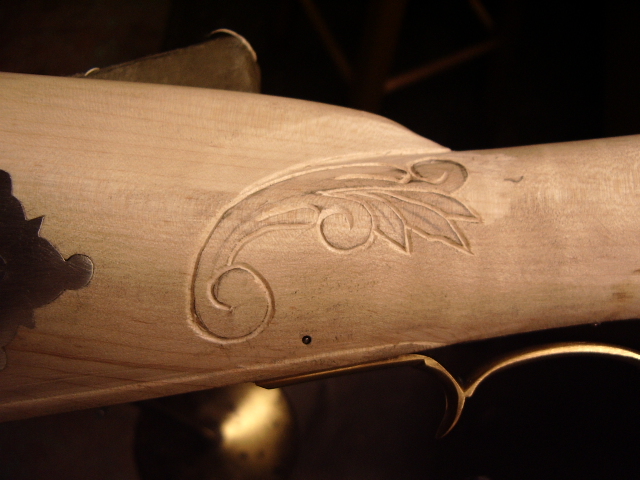
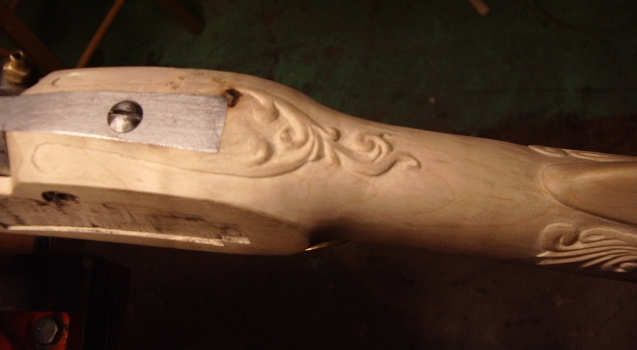
Next, I went to the front of the cheek and
drew in my wrist carving so it would flow with the carving at the rear. Also,
wanted it to flow with the curvature with the cheek piece. 
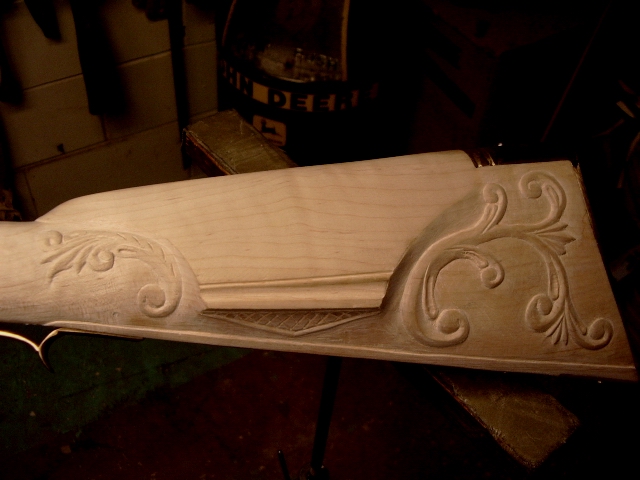
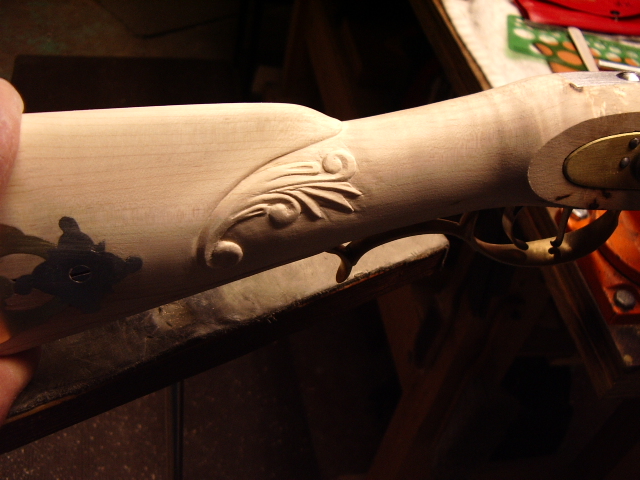
Following the same steps as before, I carved this section out and under the cheek piece, too. Here is the finished side.
To transfer the wrist carving to the other side, I traced the carving onto tracing paper. Laid the tracing paper face down on the other side, making sure I had the two carvings lined up and then rubbed the tracing onto the stock. Lifted the tracing paper and penciled in the lines to make them darker.

I wanted to place a carving behind the tang on top of the wrist. Something simple, but would compliment the other carvings. Again, taking my time I drew out my drawing onto the stock.
With the carvings completed, I traced out a
double eagle for the cheek piece
inlay. Cut it out of sheet stock. 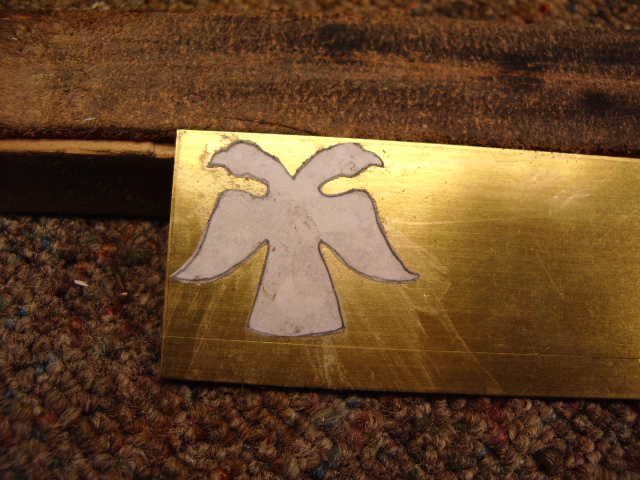
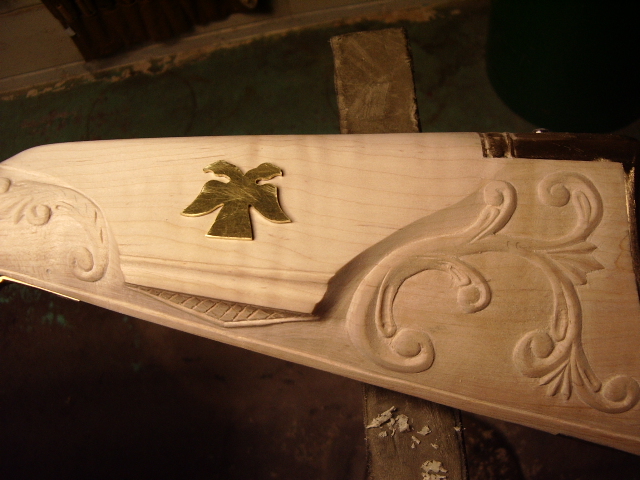
Once this was cut out and shaped, I positioned the inlay onto the stock. Now I annealed the brass to soften it so it could be shaped to conform to the cheek piece.
I used two steel brads for the eyes and 4 brass brads for the wings and the tail. The holes were drilled and I pinned the inlay to the stock with steel brads then inlayed the eagle into the stock.
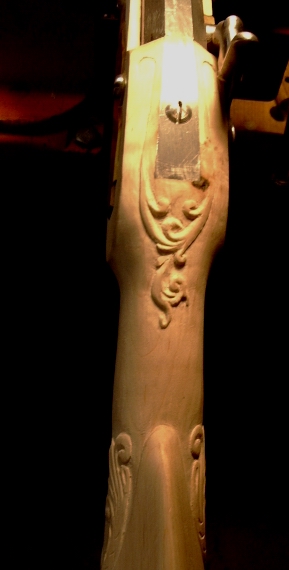
 Here is a photo looking straight down on the wrist area.