Installing the Trigger:
 The
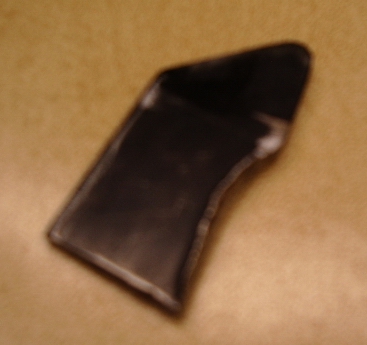
trigger was cut from a 1/8" piece of steel. It was held with a pair of
pliers and a peen hammer was used to indent one side of the steel plate. This
formed the face of the trigger.
The
trigger was cut from a 1/8" piece of steel. It was held with a pair of
pliers and a peen hammer was used to indent one side of the steel plate. This
formed the face of the trigger.
The top of the trigger was cut so we could drill and pin the trigger into place and the long slope of the top of the trigger would engage the sear on the lock. This trigger was made a little long, so we could later curl the end in a backward scroll.
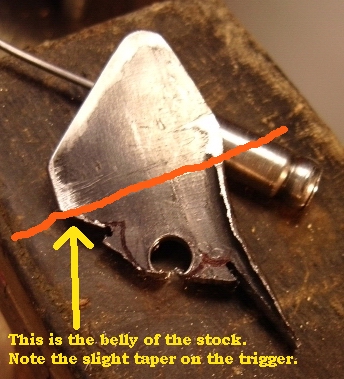
The trigger was laid
down on the side of the lock 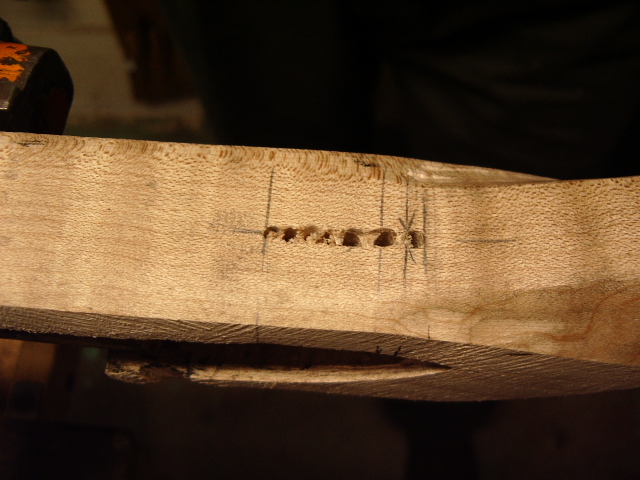 panel
area so we knew where it needed to be located. Drew two lines on the stock.
These lines were transferred to the bottom of the stock. With a center
line drawn on the the bottom of the stock, we had a line to drill a series of
1/8" holes to make our slot in the belly of the stock for the trigger.
panel
area so we knew where it needed to be located. Drew two lines on the stock.
These lines were transferred to the bottom of the stock. With a center
line drawn on the the bottom of the stock, we had a line to drill a series of
1/8" holes to make our slot in the belly of the stock for the trigger.
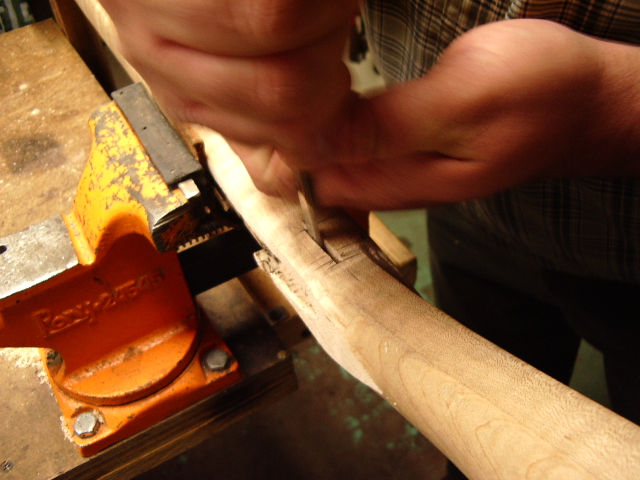
Here Bill is drilling
out the holes in the stock.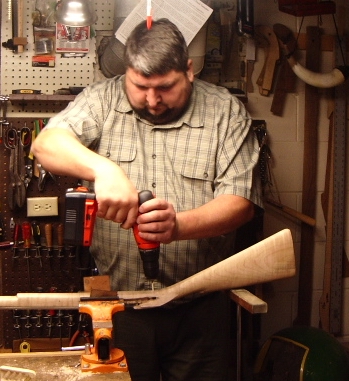
To determine the depth of the holes, we measured the depth of the trigger into the stock to the belly. Then putting a piece of masking tape on the drill bit, we were able to drill the depth of the holes uniformly.
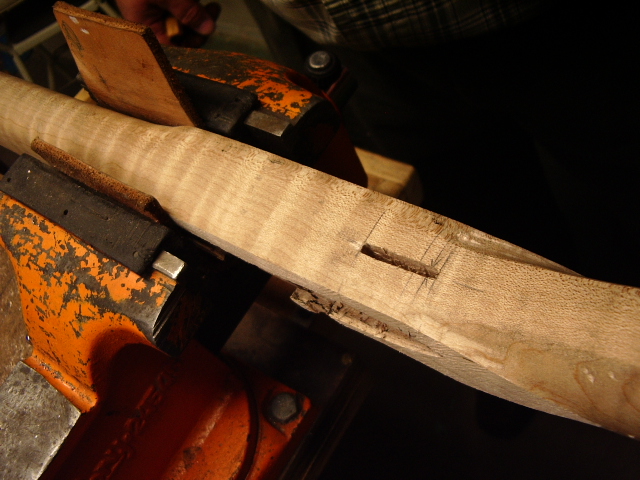
Now Bill is using a 1/8" chisel to remove the wood from the slot.
Now we have nice 1/8" wide slot to the proper depth.
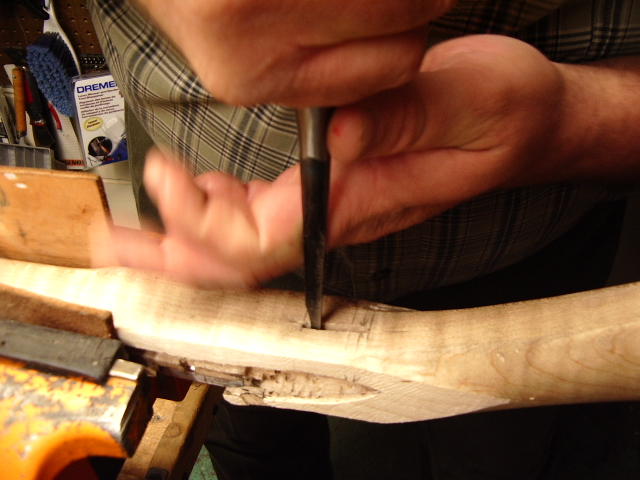
 To
allow the trigger to pivot easier inside the slot,
To
allow the trigger to pivot easier inside the slot, 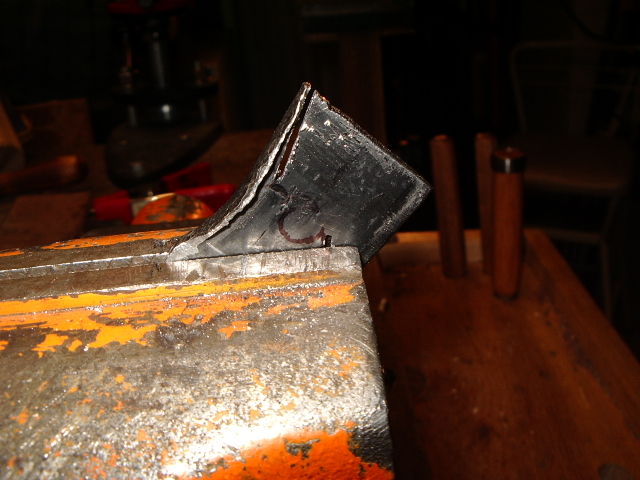 we
needed to taper the lower back end of the lock, while at the same time draw a
little scroll work into the back side of the trigger. Using a hacksaw and a
drill to drill the hole, we started working on the lock.
we
needed to taper the lower back end of the lock, while at the same time draw a
little scroll work into the back side of the trigger. Using a hacksaw and a
drill to drill the hole, we started working on the lock.
Bill will finish the clean up work on the trigger later. For now, we can insert the lock into the slotted cavity. We had to clean up the side walls a little to make sure we had a snug, yet a fit that would allow the trigger to pivot easily.
With the trigger fully inserted, we
drilled a 3/32" hole thru the trigger and the stock, all the way thru.
(Sorry missed the photos for this operation). We drilled thru the upper peak of
the trigger inside the lock cavity. Removed the trigger, and cleaned up
the holes in the trigger using a countersink bit on both sides of the 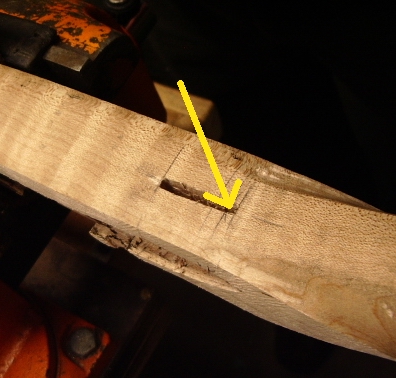 trigger
pivot hole. Taking a 3/32" pin, I swedged one end of the pin using a
peen hammer. This swelled the pin on one end, so the pin can not pass thru the
trigger. Using the 1/8" chisel, I removed wood inside the rear area of the
slot under the surface, (photo at right) this allows the trigger to pivot back
thru the lock sear. The sear itself will push the trigger back into
position.
trigger
pivot hole. Taking a 3/32" pin, I swedged one end of the pin using a
peen hammer. This swelled the pin on one end, so the pin can not pass thru the
trigger. Using the 1/8" chisel, I removed wood inside the rear area of the
slot under the surface, (photo at right) this allows the trigger to pivot back
thru the lock sear. The sear itself will push the trigger back into
position.
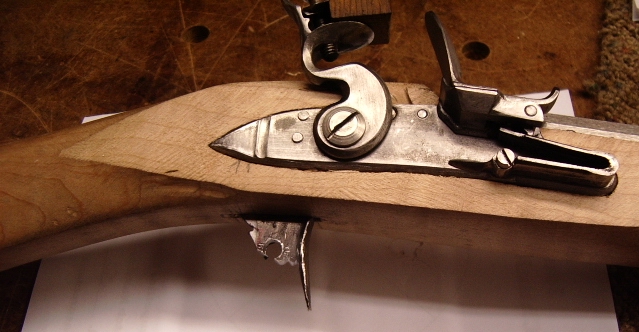
Here is a photo of the trigger installed.
Here is a movie of the
trigger in action: